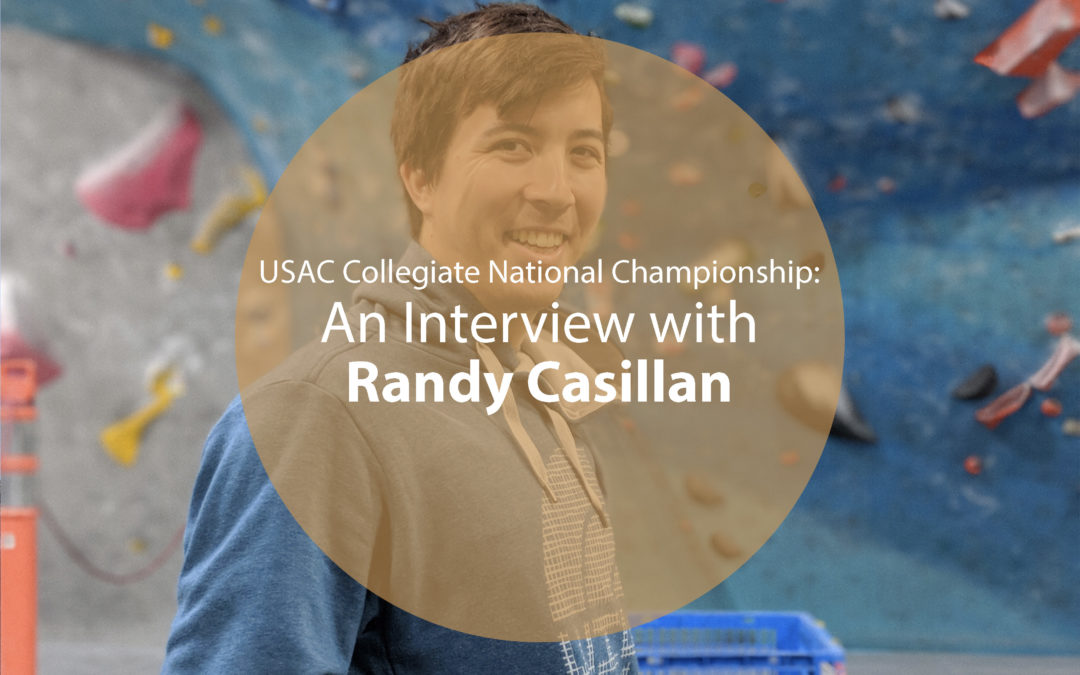
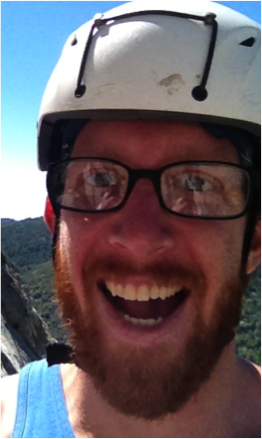
Randy Casillan, possibly better known as RC, is Sender One SNA’s routesetting foreman. Recently, he was invited to set for the USAC Collegiate National Championship at Momentum Indoor Climbing in Houston, Texas. We interviewed Randy about his experience at the National Championships.
Hello Randy. For those of us who aren’t familiar with you or your setting style, can you tell us a little about yourself?
Hi. I’m Randy, I’m the SNA routesetting foreman. I’m RC. I set what I think will be fun; climbing is like a puzzle. I like challenging people, and making them “solve” my climbs. Climbing is more than just a physical challenge, there’s a huge mental game in climbing. That’s why they’re called problems.
That’s awesome, that’s probably why they invited you to set for the Collegiate National Championship. Can you provide some background on the event?
The championship was a two day event, and we set at two Momentum gyms. We had climbers come from all over the place, I even saw some climbers from Sender One there. We set boulders and sport climbs. It took a whole week to prepare for the event.
Wow, a whole week! How many other setters were there? Did you enjoy meeting and them?
I’m a social butterfly with the other nine routesetters. We had our own texting thread. I sent GIFs, and had a lot of fun. It was great connecting with the other setters. It wasn’t just climbing, we stayed out and hung out throughout the week.
So you made friends. How was setting with them?
All the sets were a team effort. There was a lot of setting to do with a very diverse skill-level to accommodate to. We all had a say in everything, and we set climbs from V3 to V10. I even helped set a 5.8 for ropes.
Did you learn anything from the other setters? How did you contribute to the team?
Absolutely! Climbing is constantly changing and everyone has their own styles and ideas. Competition sets are a different game than commercial sets and it gave us an opportunity to try some new things.
I learned a bunch of new things, and Momentum has a lot of cool toys and tools that I got to try out. I think I was an I was positive influence on the team. I believe I have great attention to details, I notice things. I liked tweaking certain aspects of the climbs to just make the flow smoother.
Can you tell me how competition sets are different than regular sets?
For competition sets, we’re really testing someone’s skill in all aspects of climbing. We use the Risk-Intensity-Complexity scale for the climbs. Risk means a high commitment moves, like dynos. Intensity is the raw strength required for the climb. Complexity means the technical aspects of the climb, or the creativity in reading the route beta.
In the gym, I just like to set what I think would be fun to climb. I set all different aspects so I can challenge everyone and help them improve.
What was the best part of the competition?
Finals night was the pay off for all of our hard work. Watching the climbers try to figure out our climbs, and feeling the energy and hype from the crowds. The crowds would just go wild when the climbers would make certain moves, or finishing the climb.
Did you bring anything back from your experience? How is going to affect your sets at Sender One?
Well, I got this super cool jacket. And I’m back on dynamic moves. Paddles, I’m gonna set a bunch of paddles. Low percentage, high commitment moves. Risky moves, cross dynos, and such.
Would you like to see anything new at Sender One?
Our gym is perfect. But I saw some cool new holds that we’re planning on getting for Sender One.
Any advice for the climbing community out there?
Climbing is hard. Never quit. And all climbing styles are good. I’ve seen it all and it's always fun.
Thanks Randy.
Thank you.
Sender One SNA will be hosting the USAC Sport & Speed Youth Regional Competition. Click here to volunteer for the event!
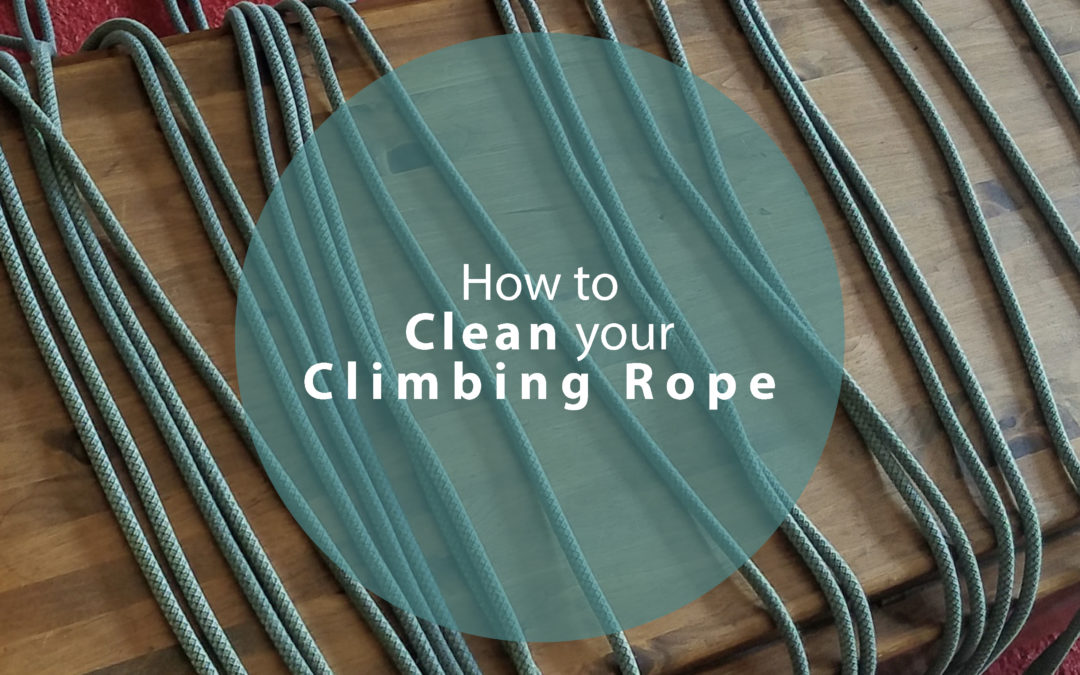
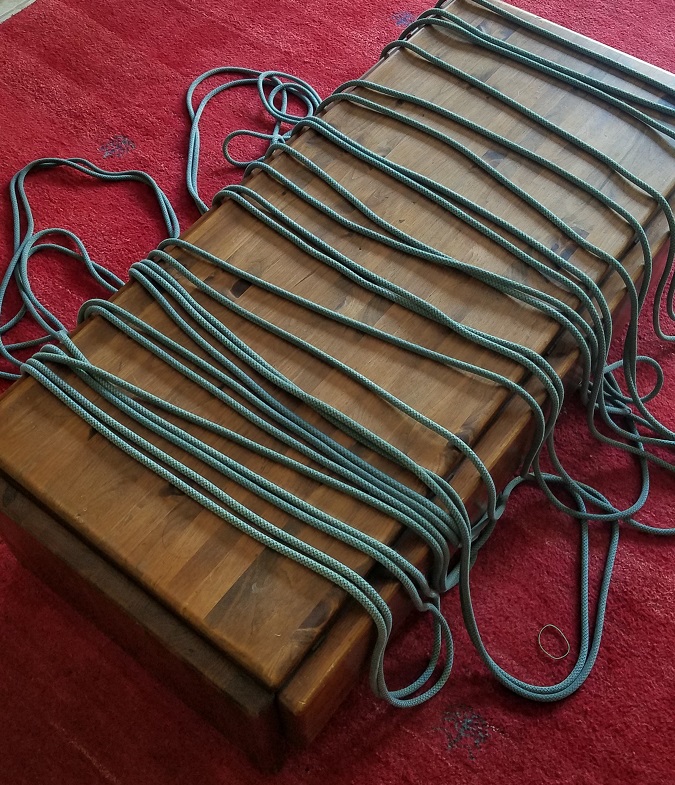
I’ve had my trusted rope for two years. It’s dynamic, durable and my life depends on it.
It only seems right then, to make sure the rope’s well taken care of. While I’ve taken precaution to keep my rope on the tarp and not step on it when climbing outdoors, rinse it every few months, use a proper rope bag, and make sure it stays flaked when it’s not in use, I really only washed it for the first time two weeks ago.
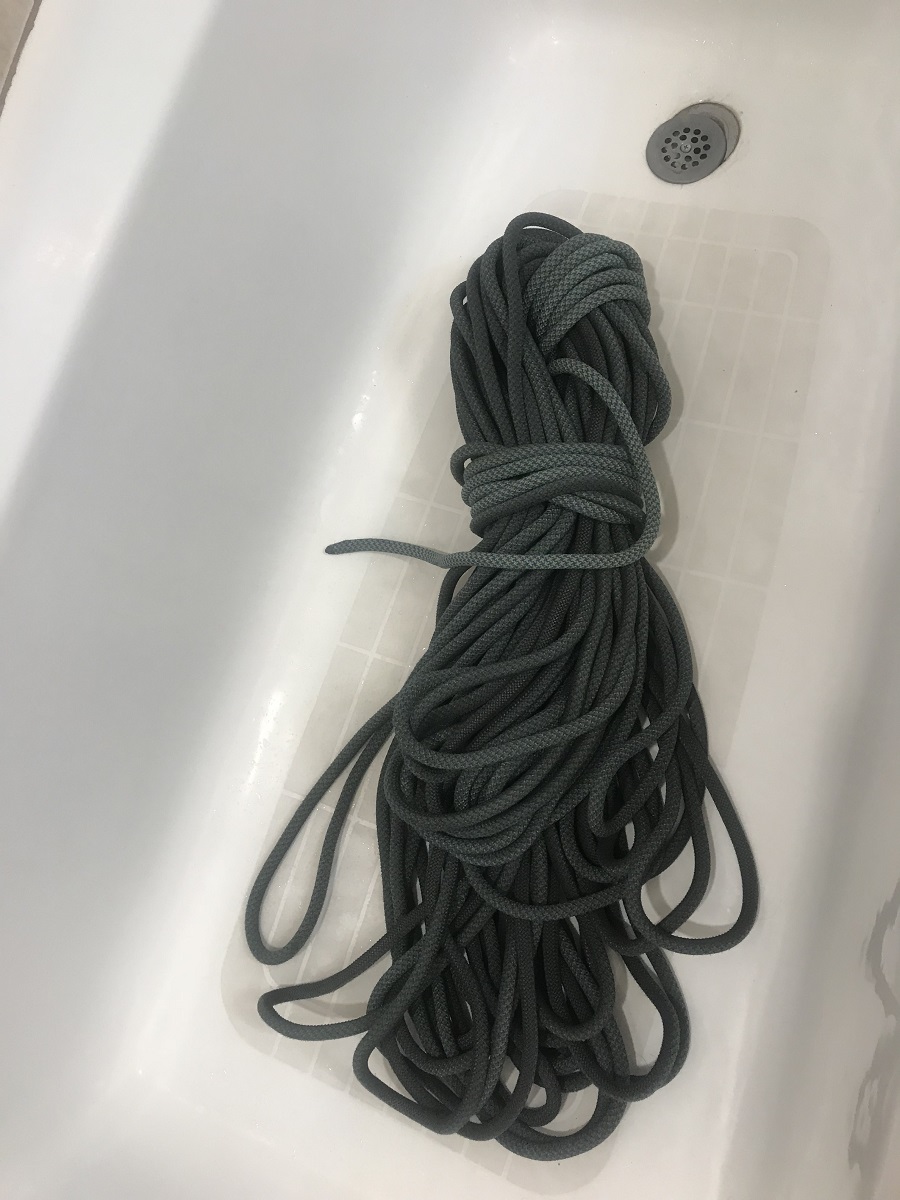
My rope has journeyed up many routes and picked up dirt across different crags. My climbing friends can attest that I probably had the dirtiest rope among our regular climbing group. I used to pride myself on the fact that my rope was well used, but after belaying one day and noticing that my hands were black as night after only one climb, I decided it was time to wash it.
But how?
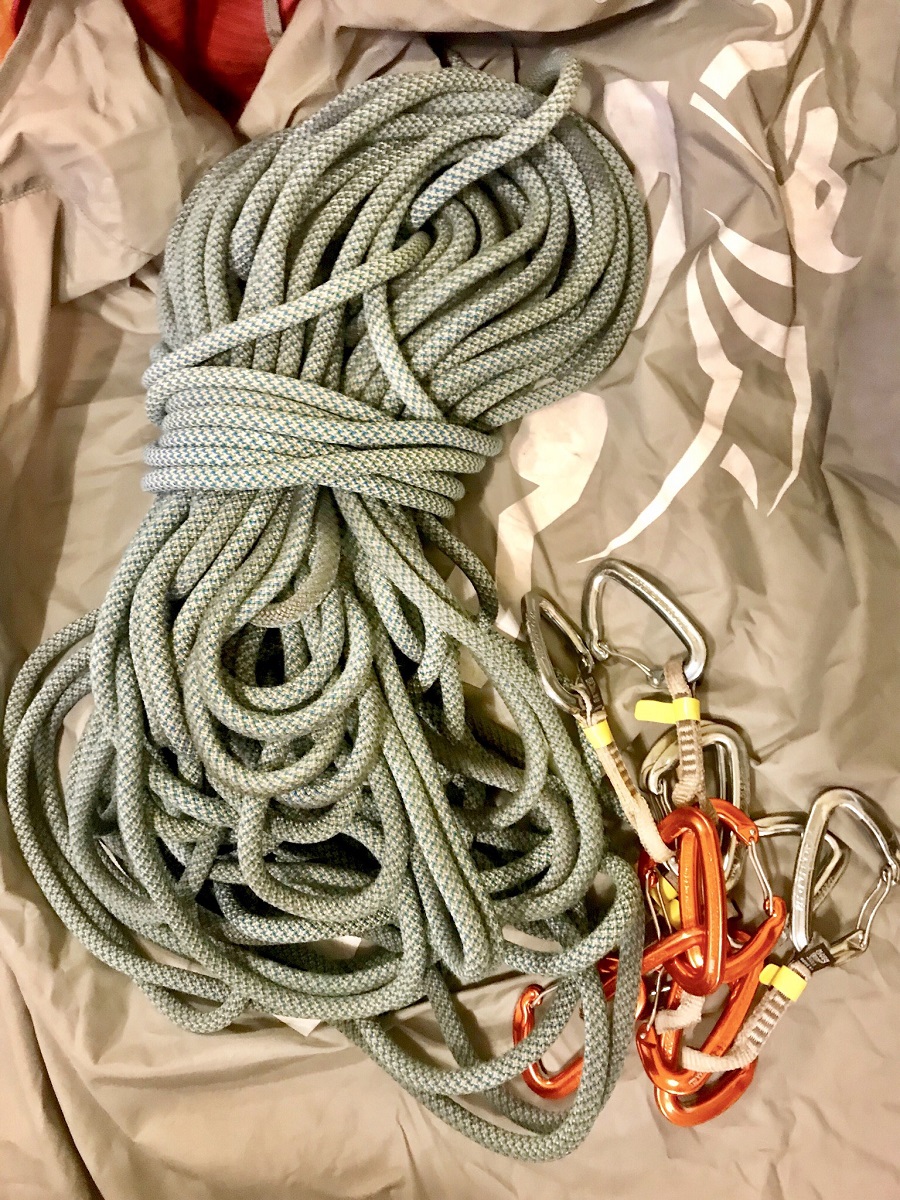
After talking to a few fellow climbers, reading threads and making a trip to REI, I was equipped and ready to take on the challenge.
What you need:
Tub, bucket or a sink that you don’t mind getting dirty
Rope soap (Editor's Note: Recommended. Other detergents are potentially damaging to ropes.)
Warm water
Gloves (optional)
While cleaning the rope using just warm water may be a good enough solution, I decided to use the Edelweiss Rope Wash because my rope was too dirty for just water to clean. I have also heard of climbers throwing their rope into the washing machine*, but I would encourage washing the rope by hand. Who wants all that rope dirt in the washer where your clothes go anyway?
Step 1:
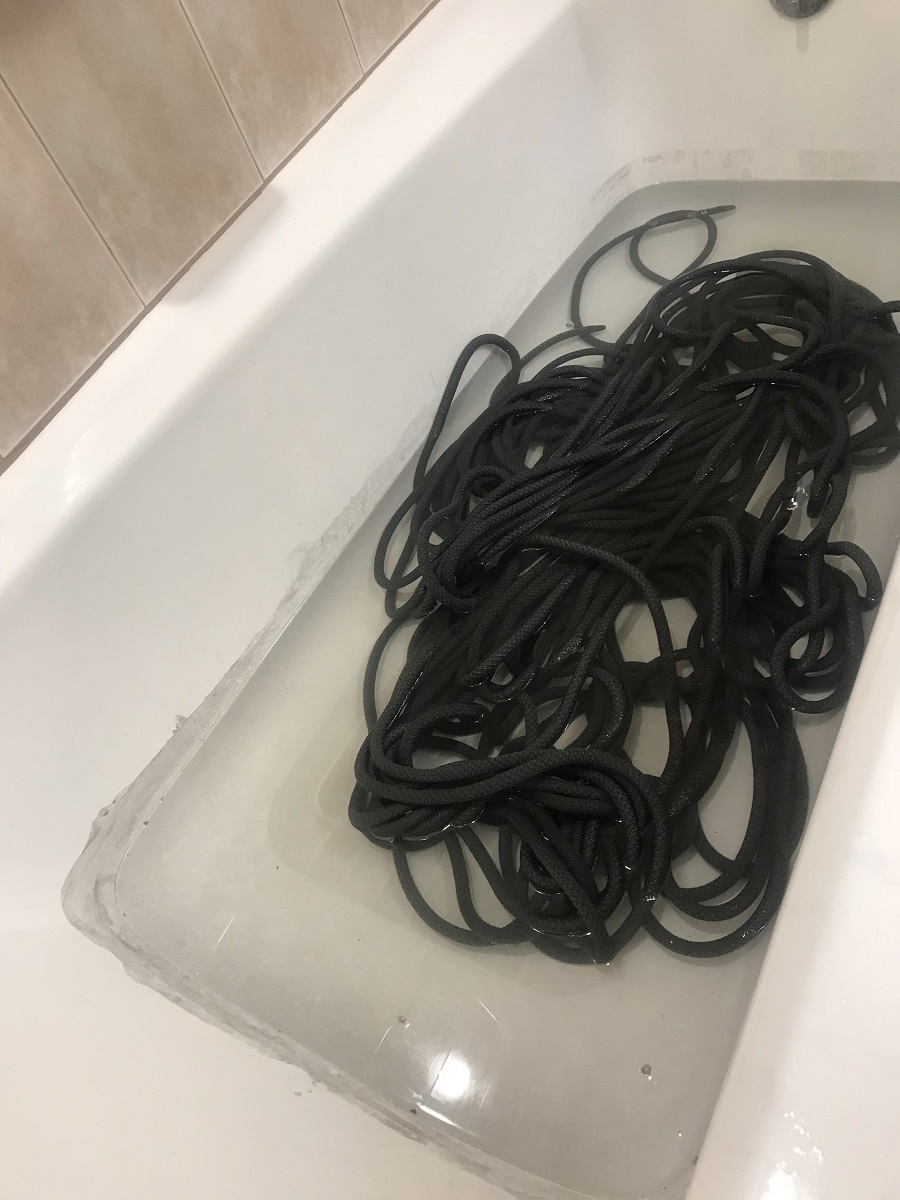
I used the bathtub at home and placed my filthy rope inside. Then, I filled the tub half way with lukewarm water. Editor's note: Washing your rope may stain your bathtub! Wash at your discretion.
Step 2:
Let the water soak. I left the rope in the tub for about 5 minutes. During this time, I cleaned the inside of my rope bag.
Step 3:
Swish it around. I pulled and squeezed the rope to make sure all the sediments were coming off, and that every inch of the rope had been in the water.
Step 4:
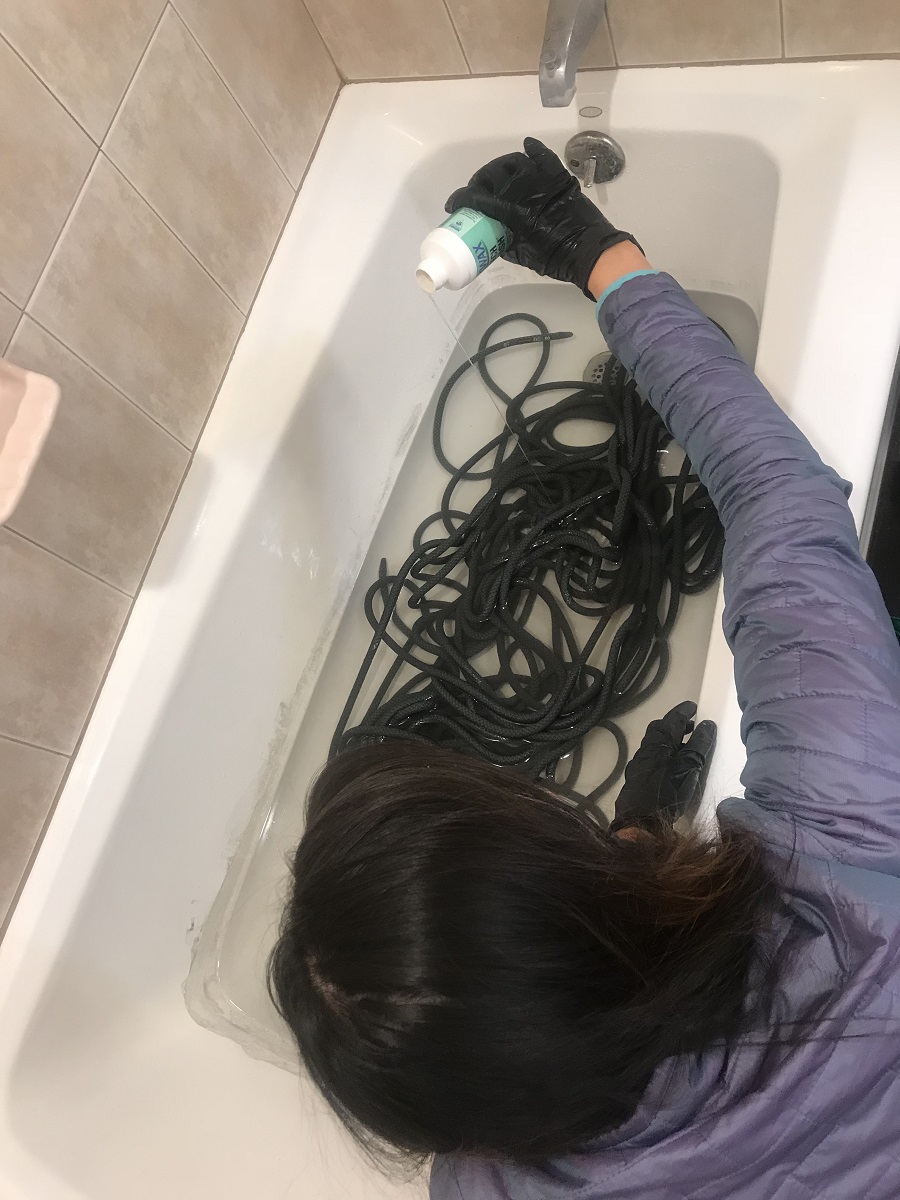
Add rope wash. If you’re intending to use a wash, a small amount will usually suffice in getting the grittier dirt out.
Step 5:
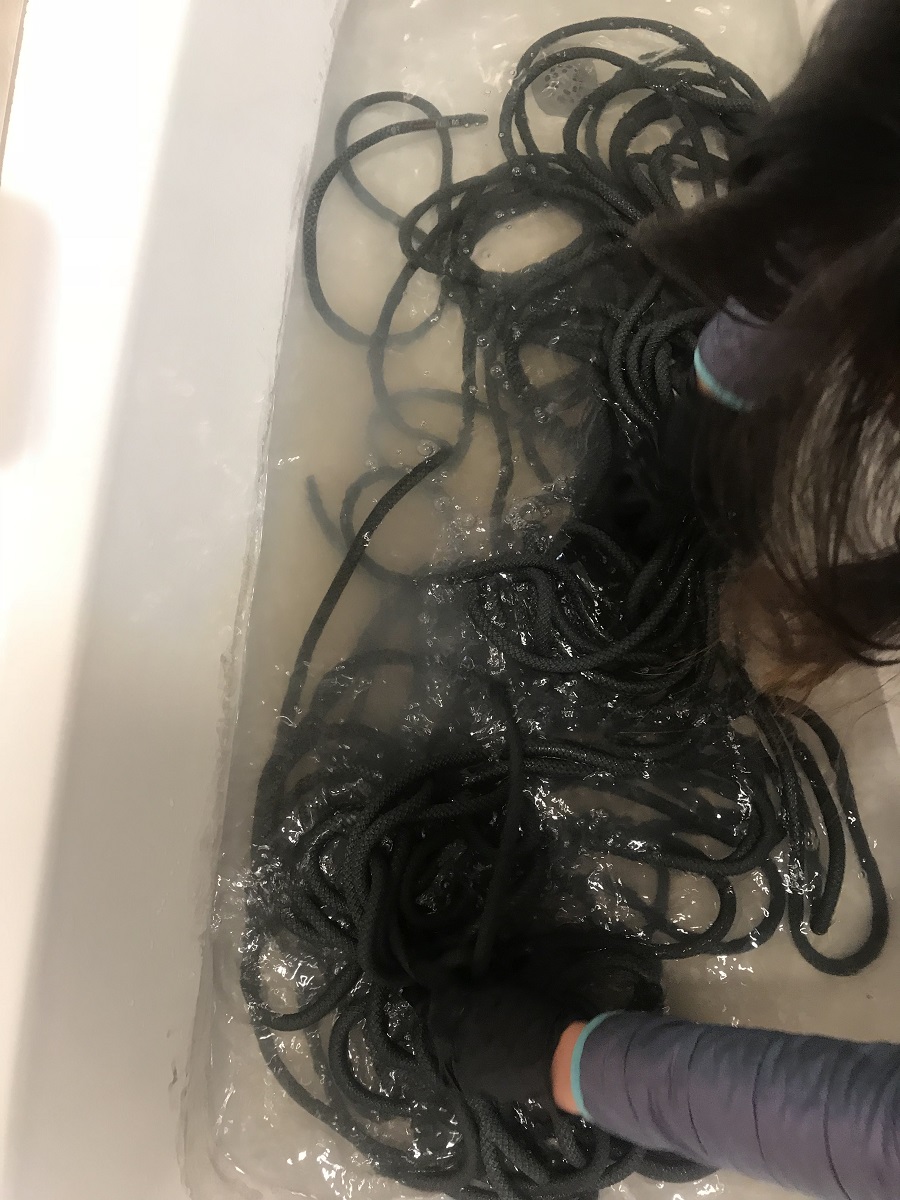
Scrub and Swish. Pull the entire length of your rope through your hands and scrub with your fingers.
Step 6:
Drain the water, rinse the rope and then refill the tub with clean water to rinse and/or scrub the rope again. I drained and refilled the tub four times before the water started getting clear again.
Step 7:
Dry thoroughly. Flake the rope out of the tub and lay it across a water-friendly area like a towel, balcony or shower-curtain rod. In my case, I laid it across the bike rack in my garage and away from direct sunlight.
Once it’s completely dry and looking brand new again, flake the rope one more time to make sure the rope is clean, tie the ends, and put it back into your rope bag. And voila! Guaranteed that the next time you go climbing, you’ll feel great pulling out some clean rope to set up on a new route.
To ensure that your rope stays in its optimum conditions, I would suggest doing the following:
Store your rope in a dry place, away from heat and direct sunlight. Exposing the rope to too much direct sun can damage the fibers and fade the colors. This includes keeping the rope in your car on a hot day.
Make sure that your rope is on a tarp or something similar when you climb outdoors, since dirt and sediment can easily get onto your rope. Also, you don’t want anyone to accidentally step onto your rope.
Inspect your rope as you flake it to make sure there aren’t any fuzzy areas, cuts, flat spots or weird misshapes in your rope. It’s normal for a rope to get weaker over time, especially in the event that you’ve taken a huge fall or have owned the rope for more than a year, so this inspection is important**.
* Please research and wash your rope in a washing machine at your own discretion.
**This post is a general guide to maintaining your rope. If you are uncertain about the integrity of a rope, have it inspected by a professional. Sender One is not responsible for any rope failures via use of this guide.
Climbing in the morning is such a chore. You have to wake up before the sun rises and it makes you feel more productive than you should be. The drive is forgettable without the usual vexation of traffic. Then, you get to the gym and nobody's there, except for the bright and cheery-eyed front desk crew. Your voice echoes through the empty space when you ask for tension and no one is there to watch you send your project except for your belayer. You can do laps on your favorite routes and you don’t have to wait for any to free up. If you encounter a spinner, you get to be the hero and report it to the front desk, who probably knows why you’re there to talk to them anyway. Finally, when you’re climbing outdoors, you’ve developed a habit of an early start and waking up early is no longer such a pain when you want to beat the heat and the crowds to the crag. If these aren’t enough to convince you not to climb before work, here are four more reasons why exercise in the morning sucks:
Burn more calories
Boost your EPOC (Excess Post-exercise Oxygen Consumption) - otherwise known as oxygen debt or the “afterburn”. EPOC explains how your body can continue to burn calories long after you’ve finished your workout. So, the intensity of your workout directly correlates with the amount of EPOC benefit you receive.
Win win win, no matter what
Don’t get derailed by last minute errands, to-dos, or a late night at the office. Getting your workout done first thing in the morning ensures that nothing else gets in your way and you can stick with your training program.
Morning exercise can not only improve the length of sleep you enjoy, but also your quality of sleep by promoting deeper sleep cycles. Exercise releases a healthy dose of adrenaline which is great for waking up, but not so great in the evenings before bed. The hormones released during exercise also improve your internal digestion and system on a more consistent and regular basis.
Editor's note: Iris climbs EVERYDAY at 7AM.
With all of this being said, I hope you take my advice and never climb in the morning.
Guest blog by: Hank Greene NSCA Certified Personal Trainer, Physical Therapy Aide, Ginger
--
Hurting yourself sucks. Most climbers have been there; icing the haggard appendage on the couch while Percocet induced facebook likes flow from your fingertips like lava, stoking the fire of your able-bodied amigos as they post pics of epic sendage. If you’re lucky, there’s probably a good story to accompany your injury – a huge throw, a sketchy top out, maybe a helicopter medevac. If you’re unlucky, the story probably goes something like this, “I was on my seven-bajillionth go on that dope green V-whatever at the gym, I stuck the dyno, felt a pop in my [insert bodypart] and its been hurting ever since.” Injuries like the aforementioned dyno are a result of acute trauma; meaning they’re caused by a sudden, one-time application of force. Injuries can also result from overuse, poor positioning, or a combination of one, two or all three of these elements. When we climb, the positions we put our bodies into puts a lot of stress on our joints and tendons. If loaded incorrectly, these tissues might not be able to handle the stress. However, if attention is paid to posture and shoulder positioning during a climb, much of this excess stress can be alleviated.
Chris Sharma warming up on a 5.8 in Spain
Shoulders in particular like to find themselves in poor positions, so for that reason as well as some slightly selfish ones, I’m going to focus on the multi-talented shoulder. Learning to implement ideal positioning at the shoulder is pretty straightforward, and can have a profound impact on one’s climbing ability. If you want to start practicing this regularly, or if all this talk about ideal shoulder positioning gets you riled up, and you’d like to geek out in person, lets hang out! I ramble about shoulders and get in touch with everyone’s friend Transverse Abdominus (street name: T.A.) quite a bit during my core conditioning classes (M/W 7:45-8:15pm starting January 1st), my Foundations I and II courses, and I’m super psyched to host another Injury Prevention class on December 14th from 7-9pm. Alright shameless self-promotion over, back to the issues with your tissues.
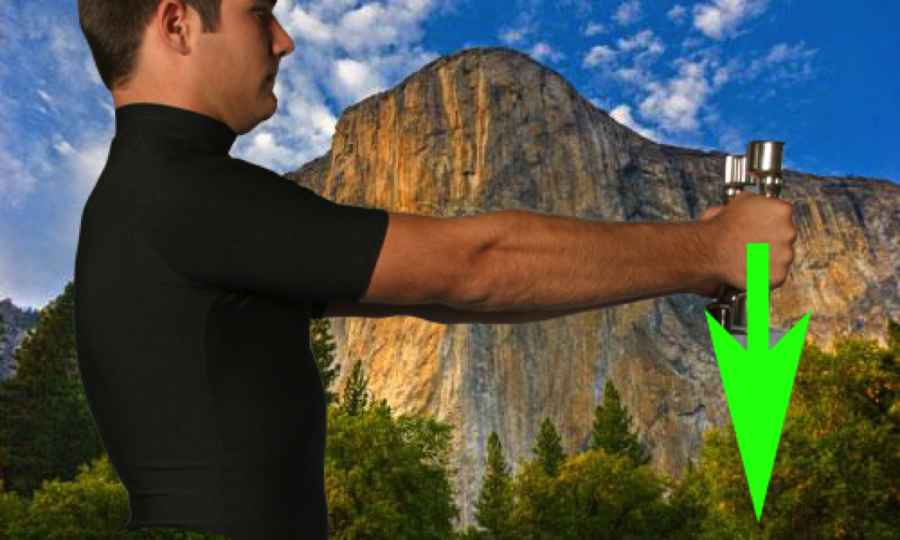
What is this “ideal shoulder position,” I speak of? Lucky for you, the ideal position of external rotation can be demonstrated by standing (or sitting) up straight, imagining that there’s a pencil between your shoulder blades (scapulae), and you’re pinching your scaps together to keep the pencil from falling. Lift your arms directly in front of you, make a fist and lock your elbows. Rotate your thumbs so they’re pointing towards the ceiling; you are now externally rotated at the shoulder (pictured below, ignore the arrow for now). This is an ideal position. Alternately, flip your thumbs towards each other then down towards the ground; you’re now internally rotated at the shoulder. This is bad.
A Guy From The Google demonstrating the ideal shoulder position, also El Cap.
External rotation gives us a mechanical advantage, which is easy to experience with the help of a buddy (or for the socially awkward, a desk, dresser or steering wheel works). Stand with arms straight in front of you, shoulders pinched, thumbs up (ideal position), and – keeping your elbows straight – try to swing your fists down towards the ground (in the direction of the green arrow above) while your buddy (maybe his name is Desk) resists this motion keeping your hands from actually going anywhere. Now, try the same motion, but internally rotate at the shoulder (thumbs down, not ideal) before you push. You were probably able to exert more force in the thumbs up/externally rotated/ideal position as opposed to the thumbs down/internally rotated/bad position. The ease of movement and shoulder stability that accompanies the pinched shoulder blades/externally rotated/ideal position, translate directly to climbing. Because shoulders are fairly important to climbers, the pinched-blades-thumbs-up habit is a good one to get into.
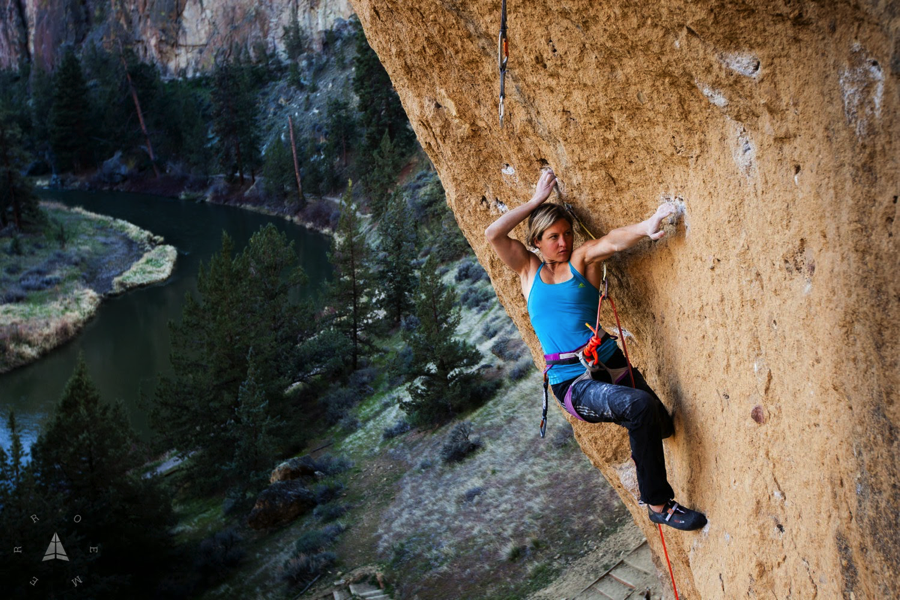
Mayan Smith-Gobat pulling the rose move on Rude Boys at Smith Rock, OR.
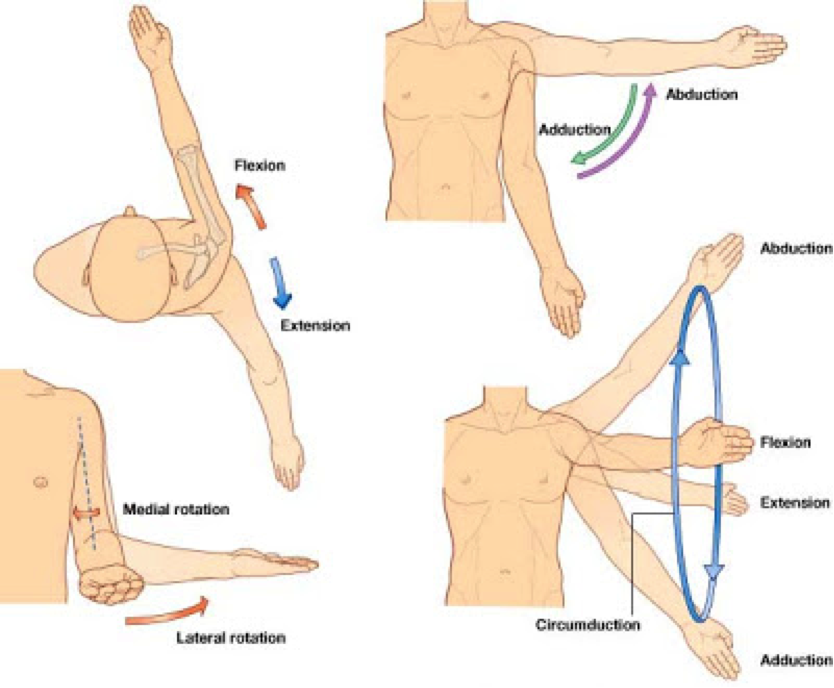
If you haven’t picked up on it yet, I like shoulders. Shoulders are fantastic, they’re like the swiss army knife of joints. Oh, what’s that? You need to reach your right hand way up overhead and grab that jug? No problem, shoulder’s got it. Oh, now you need to lock that arm off, cross your left arm through and grab that edge way out right? No worries, brah, shoulder’s on it. Shoulders have the capacity to make the seemingly impossible a little more probable. So, in short, shoulders are rad. By rad I mean that they have an extremely wide range of motion; they can rotate in and out, they can push and pull, they can adduct/abduct, and do pretty much any combination of movements (i.e. Mayan executing a textbook rose move pictured above, also the boring textbook graphic below). This wide range of motion is usually a good thing… Until it isn’t.
Range of motion at the glenoid fossa (shoulder joint)
The plethora of movements and positions required of the shoulder during a rock climb can be what makes the climb challenging, engaging, and enjoyable. Unfortunately, this wide range of motion can also be a snake in the grass, especially when the shoulder is weak, in a bad position, or both. Even more unfortunate is that these positions are often unavoidable for certain sequences.
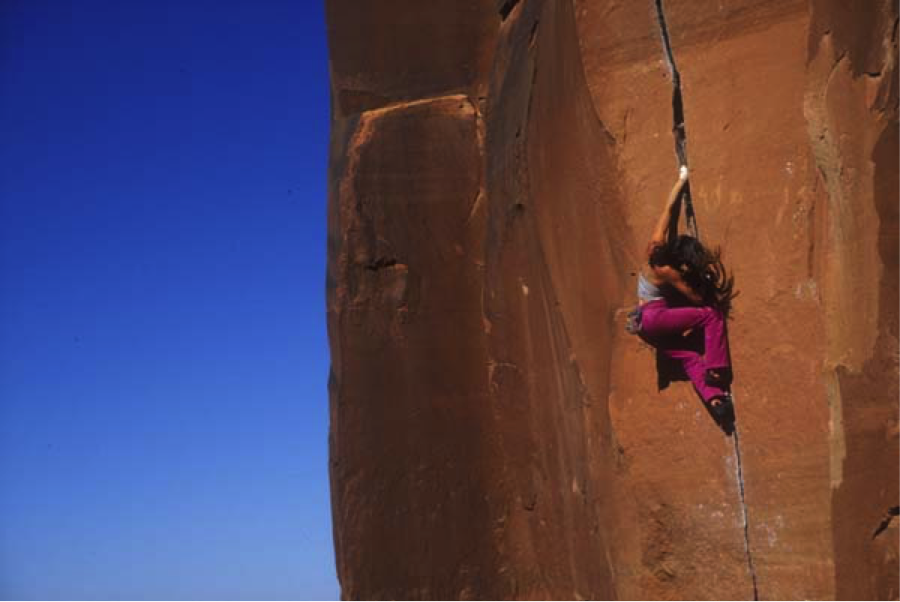
Steph Davis going thumbs down while soloing Scarface
The gaston or the thumbs-down jam are both requisite movements for any so-called climber, and are frequently encountered. These moves, while different in that one is usually found on a face climb and the other is found in a crack, share one thing; they both require the climber to exert a lot of force through the shoulder while the joint sits in a less-than-ideal position (thumbs down/internally rotated). Don’t freak out, you can still throw those epic-gnar gastons or lock-off on that thumbs down finger stack without blowing your shoulder to smithereens, just remember that if gone unloved, your shoulder might not be as forgiving next time you put it in a bad position and yard on it. Which brings me to my next point, love thy shoulder.
Love your shoulders, people. Seriously. It’s like any good relationship; warm them up if they’re cold, cool them down if they’re hot, massage them after a long day of hard work, listen to them and acknowledge them when they’re telling you to stop doing what you’re doing… You get the idea (hopefully), but regardless of your relationship status, truth emanates from this analogy. Before climbing, you should always warm up your shoulders (and the rest of your body) with some light exercises like:
Light rowing (500m in under 2:30, moderate resistance)
Hanging Scapula retractions (hang from a bar and pinch-unpinch your scaps)
Assisted pull-ups (work your way from 50% bodyweight to 75% then 90%)
Small to large arm circles both forward and back (with or w/o 5lb weights)
The humble jumping jack (it works for Sasha…).
This is your chance to get creative; any combination of movements that involves your shoulder and mimics the moves you’ll be making while climbing will suffice. Make sure to work through the entire range of motion and look for tight spots or restrictions. Once you’ve found the restrictions, its time to mobilize them with a few minutes of self-massage – I use a lacrosse ball or TuneUp Fitness ball - then some light stretching of the affected tissues, about a minute. I generally save deep massage and static stretching (always in that order) for the end of a workout, but sometimes its necessary to restore range of motion before a session. In the end, you know your body better than anyone else, listen to it, take care of it, and eliminate any minor problems before they snowball into season-ending injuries.
Thanks for reading.
--
Hank teaches Core Conditioning classes Monday and Wednesday nights at 7:45pm. He’ll also resume instructing the January series of Foundations I and II. Hank’s always available for private evaluation or tune-up sessions focused on technique, mobility, efficiency and strength - both on and off the climbing wall. Reach out to him at [email protected].*
*Knowledge bombs and game changers are consistently provided throughout each course.
Here on the blog, it's our goal to showcase our community and all the rad things you're all doing. If you're interested in sharing your adventures, send an email to [email protected].
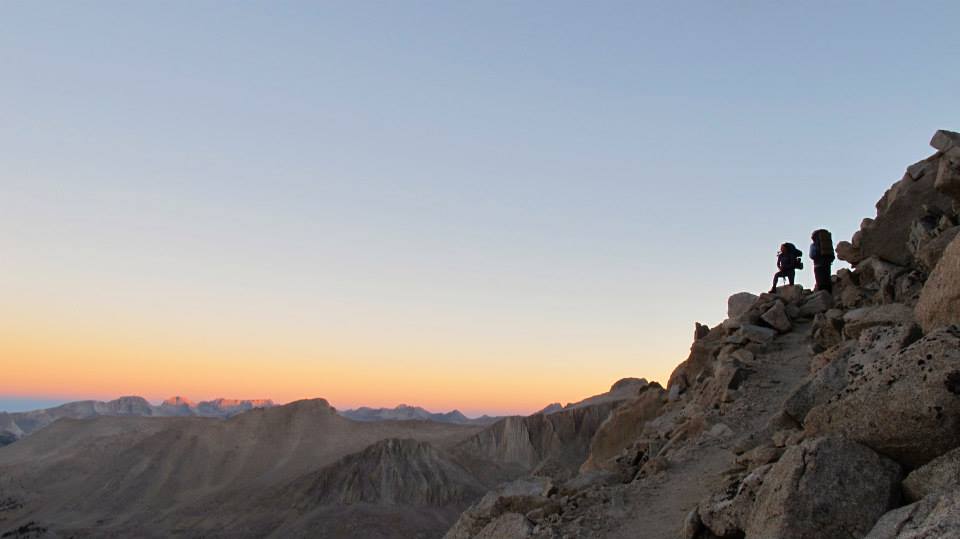
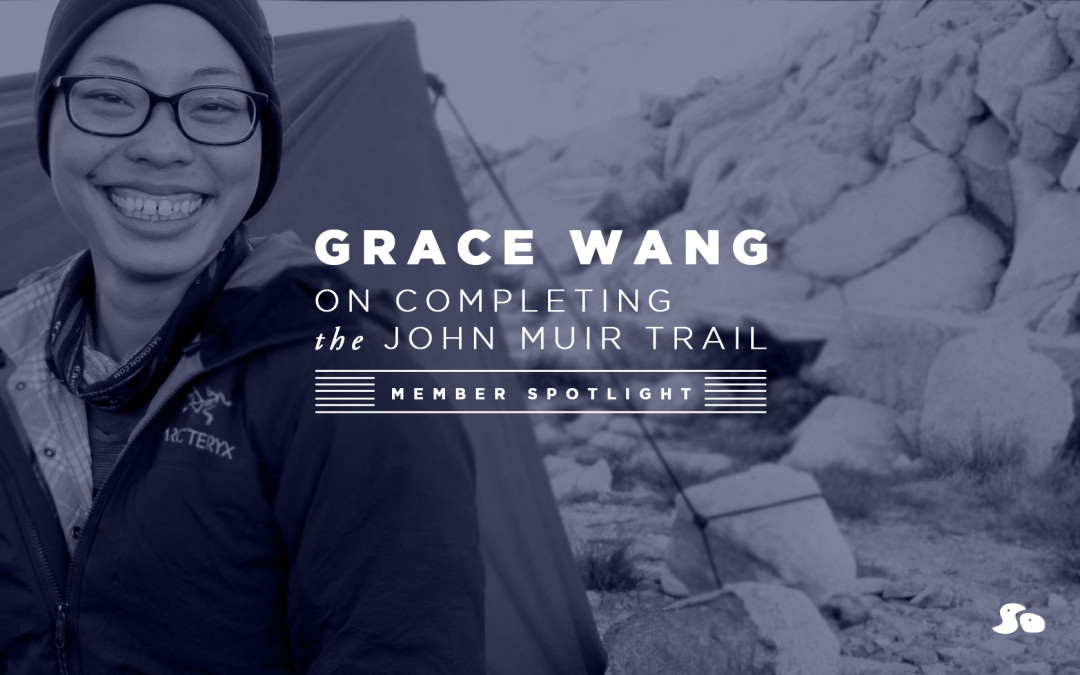
These days, a lot of us are making the roughly 200+ mile drive from SoCal to Bishop. We've all complained about the drive once or twice, but imagine walking the entire way. For many of us weekend adventurers, it's likely that the furthest we'll trek with packs on is from the car to the crag-and back to the car (then at Black Sheep Coffee Roasters resting our weary legs, espresso in hand). Not so for Grace Wang, a regular at Sender One, who has hiked all 210.4 miles of the legendary John Muir Trail.
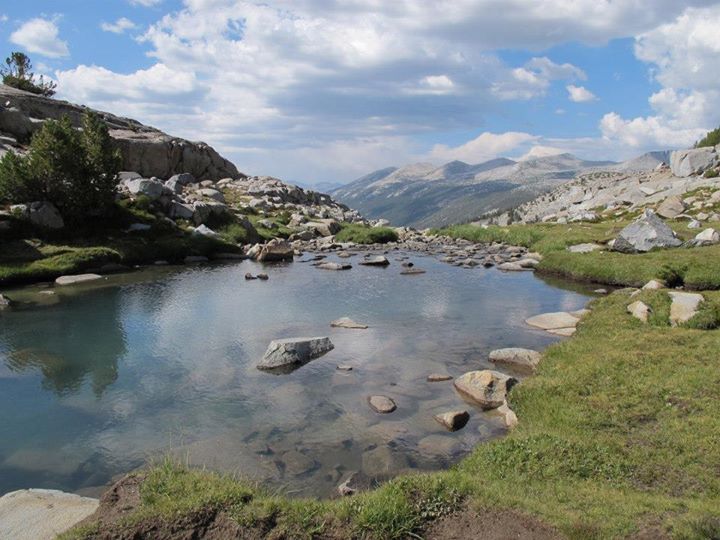
The Trail winds along the Sierra Nevada mountain range and features California's grandest natural offerings beginning with Yosemite Valley as its northernmost terminus. From there, backpackers will wind down Devil's Postpile National Monument, on through Thousand Island Lake. Then it's through the King's Canyon and Sequoia National Parks before finally ending up at Mt. Whitney in the Sierras.
Grace, an REI employee, celebrated her arrival in Mt. Whitney back in August. So now that she's well rested, we spoke to her in the hopes that we weary-legged coffee-sippers might one day be inspired to put down the mug and pursue the same!
--
Hi Grace, let's start by having you tell us a bit about yourself!
Let’s see, I was born and raised in Orange County, grew up wishing I could be a boy scout so I could do cool adventure-y things someday. I’m happy to say that I am now doing cool adventure-y things like climbing and backpacking, and am fortunate enough to have a job at REI that allows me to talk to people about all the latest and greatest outdoor toys! I am also simultaneously pursuing a career in physical therapy and enjoying geeking out about body movement/ mechanics, and rehab.
What made you want to tackle the JMT?
As a kid, my family often visited Yosemite, but only camped or stayed in a cabin. One day, I went into the gift shop and saw a JMT poster, and decided that I wanted to hike the whole thing someday. I wanted to experience the most amazing parts of the Sierras on foot rather than through a car window, and I wanted to see what my body was capable of doing, hiking-wise.
As an REI employee, did you feel particularly prepared for the task?
I definitely think that being a REI employee helped me accrue the proper equipment for the trip. Being around gear all the time and getting to talk about it helped me have a good understanding of what I would need to safely and successfully enjoy the trip. Talking to coworkers and customers that had experience with the trail also helped me figure out how I needed to be prepared for the trip.
How did you decide what to pack? Is there anything you left out?
I poured over blogs, books, and magazines when compiling my list of things to pack. From recalling and documenting my previous backpacking experiences, I had a good idea of what equipment worked for me personally, and what didn’t by the time planning for this trip came around. I also did a trial backpacking trip with the gear and clothing I was going to bring with me, just to make sure things were working well. In doing that, I quickly eliminated things I thought I would need.
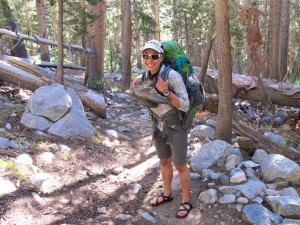
Treks along the John Muir Trail require careful preparation and every ounce of weight matters. Grace's pack had a starting weight of only 25.4 lbs., without water.
What's that one thing you realized you forgot. I know you have one...or three?
Haha. I actually don’t think I forgot anything. I checked over my stuff a million times before I left. I should have probably brought some vaseline for my nose (see below).
When the food ran out, at what point did you decide to eat your friends? If not, what was the hardest part of the adventure?
I should have eaten my friend while they were fresh, day 1 or 2, but by day 5 they were a bit too rank to eat. But really, not having enough food was definitely a real problem. I made a fancy spreadsheet detailing out what I food needed to bring, but I didn’t anticipate being THAT hungry. I resigned myself to rationing out just enough calories to finish up the trail. Also I had awesome friends and met amazing strangers-turned-friends who were incredibly generous at times! At the end of the trip, I lost about 9 pounds--which is a lot for me. Next time, I’m bringing sticks of lard.
Were there any moments you thought you might die?
Many. Just kidding, not that dramatic. But I did have a problem with my nose bleeding like crazy on many occasions. The air was so dry during the whole trip that my nose decided to let loose and bleed a bunch of times--sometimes for several hours. That was fun. Thank goodness I brought a lot of toilet paper with me for nose plugs.
What was the best part of your trip?
One of my favorite moments of the trip happen to be my birthday. It actually had been an exhausting and difficult day for me personally, and some circumstances leading up to that point made me I feel as though I might not finish the trail. But at the end of that day, with the support of my friends, we made it to our planned destination. I found myself sitting around a campfire among friends, enjoying a freshly steam-baked molten chocolate cupcake from a mix that one of my friends had been lugging around for the past 100 miles. I felt like the luckiest and most blessed person alive that night. Chocolate, friends, and fire are a good combination.
For the lay-person, what should you know before attempting the trail?
Fitness-wise, you can never truly prepare your body to hike that many days consecutively, but you can prevent injury by strengthening muscles around joints, improving your cardio, and getting proper footwear (hiking the whole trail in Chacos is a bad idea) and a decent pack. Also, test your gear out before you go and make sure it works for you--just because it worked for someone else doesn’t mean it will definitely work for you.
Biggest take-away?
A quote from John Muir puts it best, “Everybody needs beauty as well as bread, places to play in and pray in, where nature may heal and give strength to body and soul alike.” - The Yosemite (1912)

 So you made friends. How was setting with them?
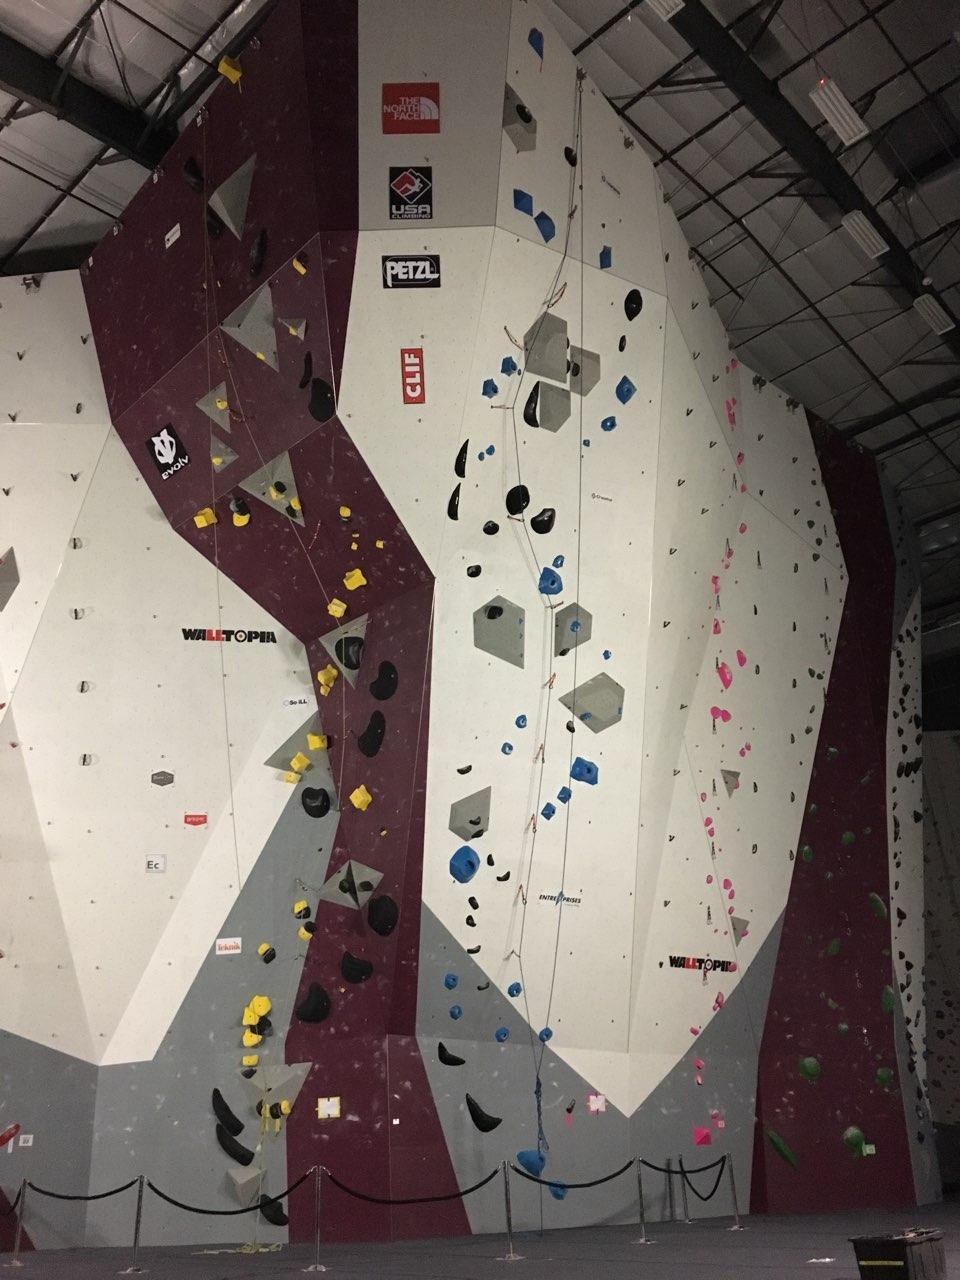
 What was the best part of the competition?


 How did you decide what to pack? Is there anything you left out?
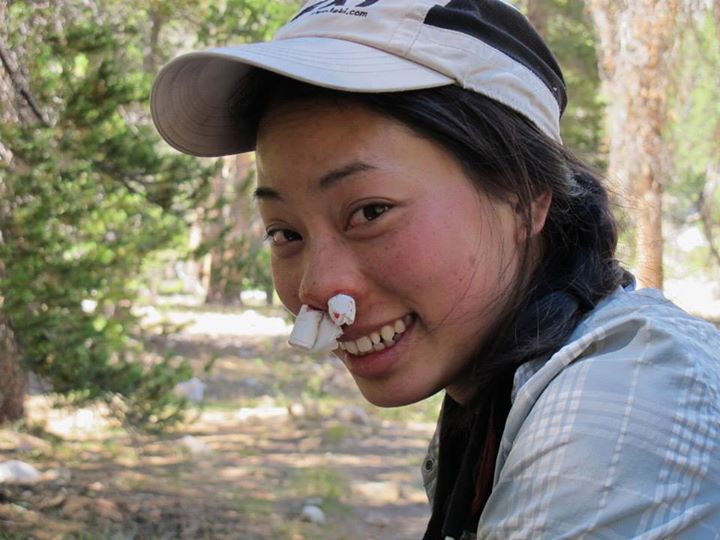
 For the lay-person, what should you know before attempting the trail?