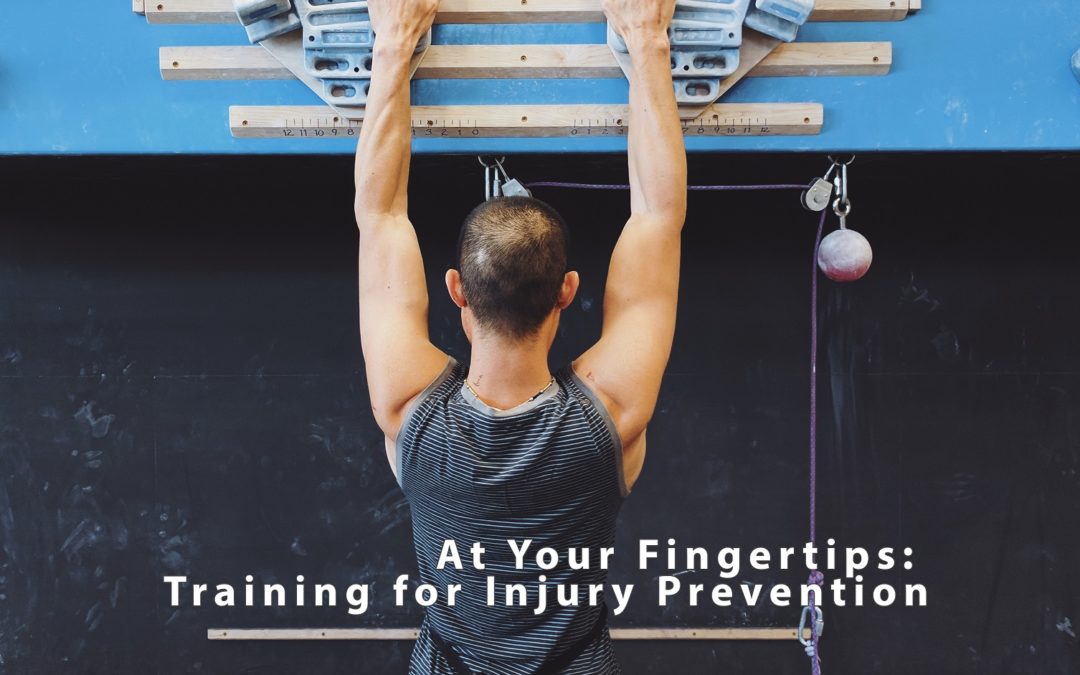
by Sender One | Mar 7, 2018 | Blog
the contentWords by Jane Chin, Photos by Cass Chin
Sender One Santa Ana (SNA) and Los Angeles (LAX) both have competitive ("comp") teams that practice at their respective "home gyms". Given the distance between the two gyms, Sender One coaches hold monthly full team practices and an early season "all team lock-in" event. This encourages bonding between comp team members and fosters cohesion for Team Sender One. For the 2018 sport and speed climbing season, the all team lock-in event took place at Sender One LAX on February 17, 2018.
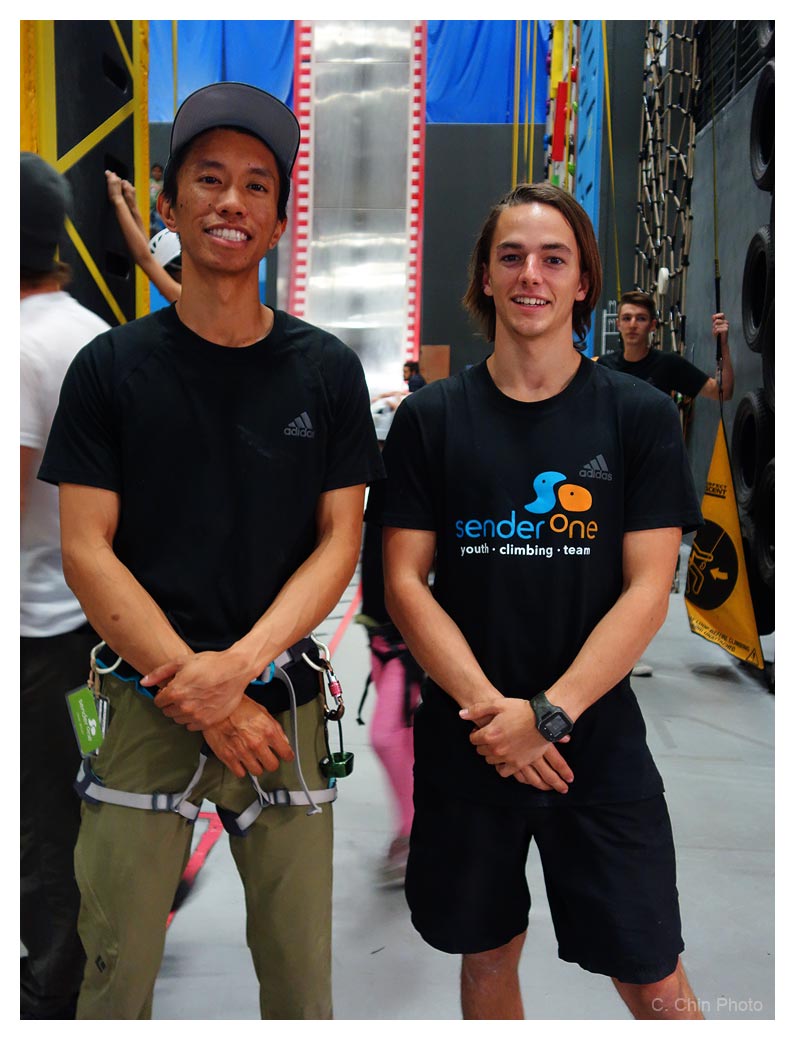
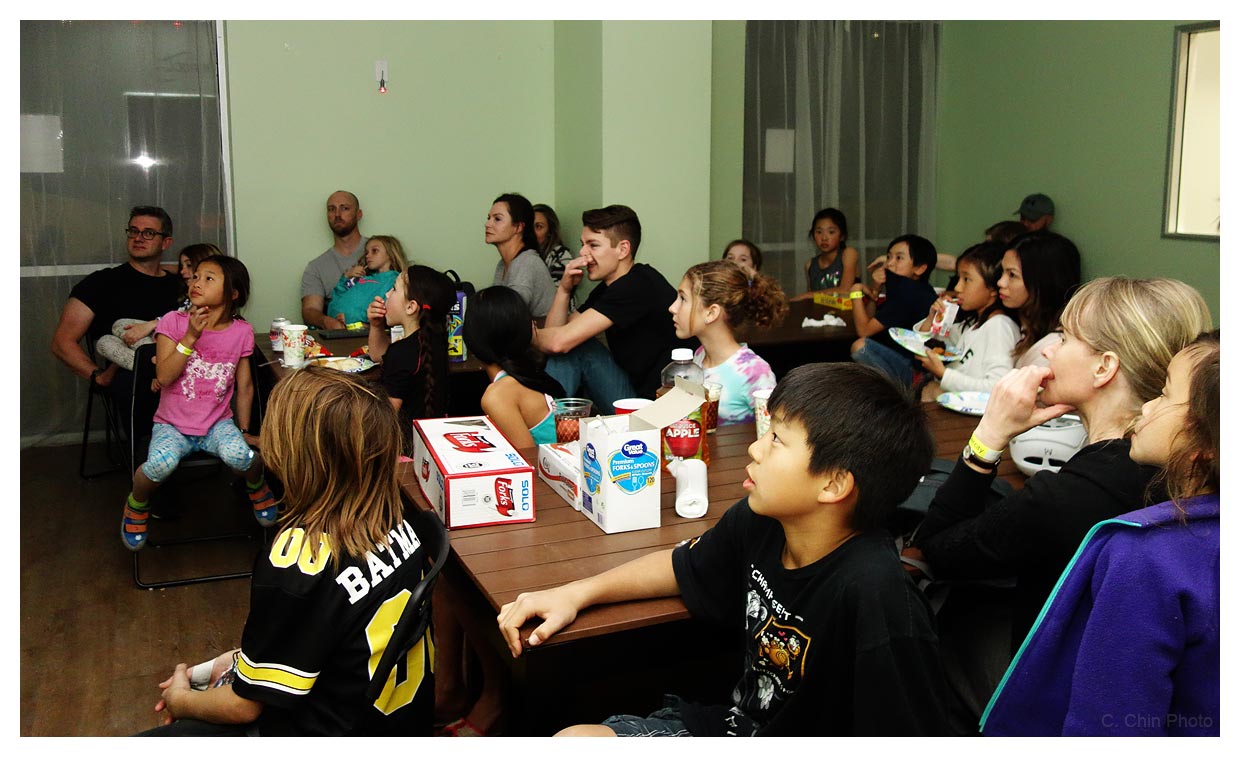
While the Sender One Youth team trained together, coaches Christian and Nate held a parent orientation to discuss team goals and important information about USA Climbing membership requirements for competitors. Many parents were new to the comp team, and climbing in general, and welcomed a forum where they asked the coaches questions about training methods, safety, and USA Climbing rules. Coach Christian Mercene, the SNA youth head coach, really listened and addressed new parents' questions and concerns. Coach Nate Withey, who has extensive personal competition experience, was able to answer technical questions about USA Climbing's rules. Parents are encouraged to visit
USA Climbing's rules page and watch the short video explaining its competition rules.
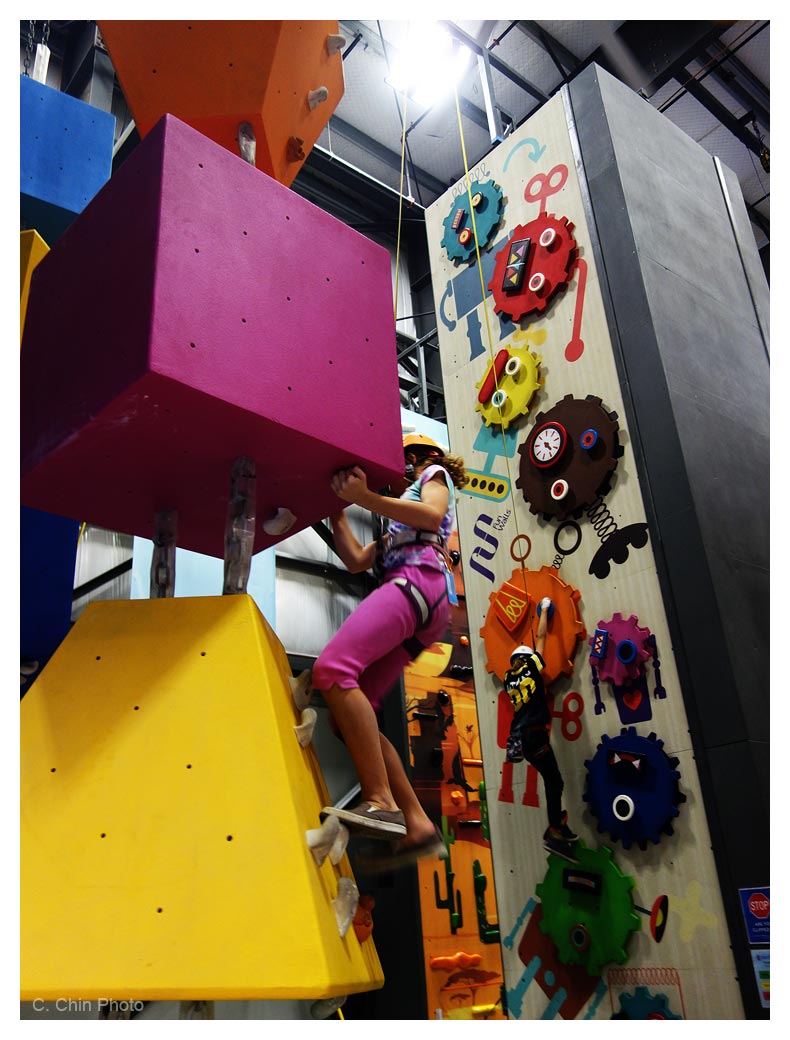
After training and dinner, Team Sender One visited
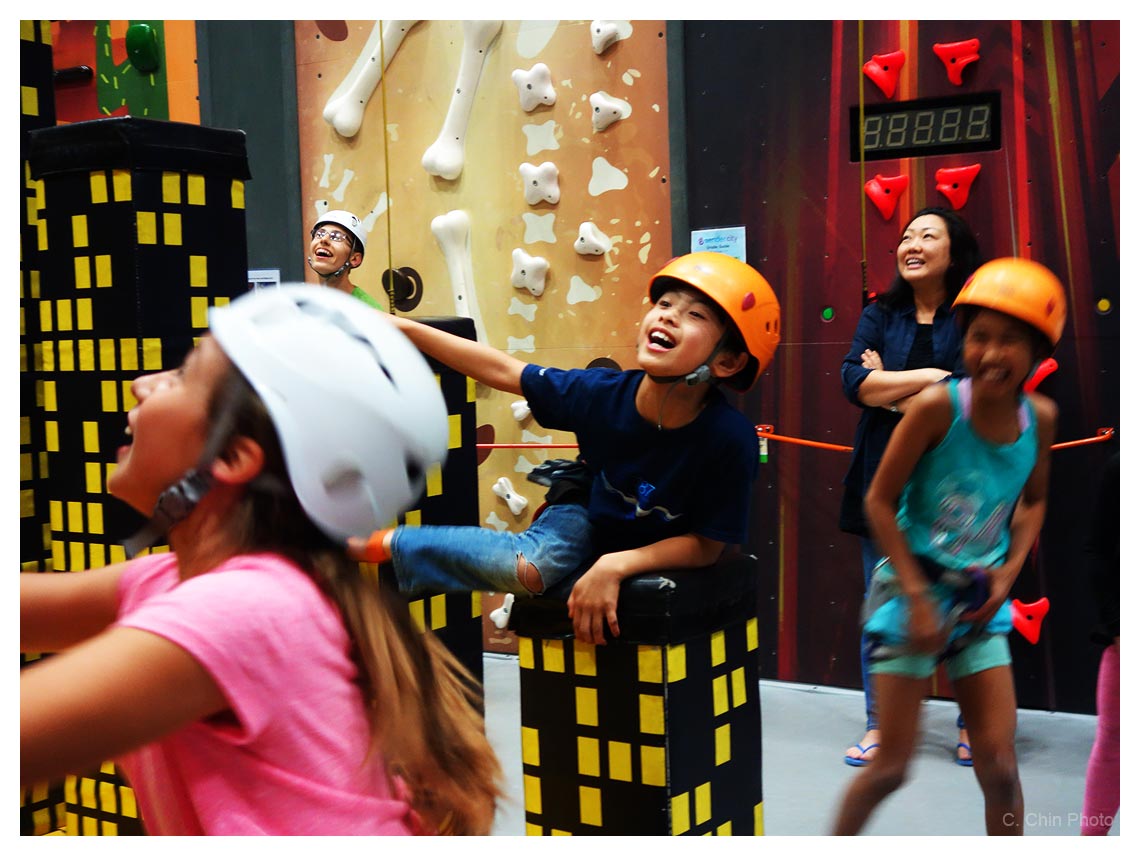
Sender City. Parents were welcome to try out the obstacles, some of which were quite challenging! My husband won the "speed climbing challenge", but I was able to pass his high-point on the the "moving cog-wheel" climbing problem. Many of the challenges required leaps of faith, such as jumping off high objects or platforms into the air, which are wonderful exercises in "trust" and made these obstacles popular in adult team-building/confidence events.
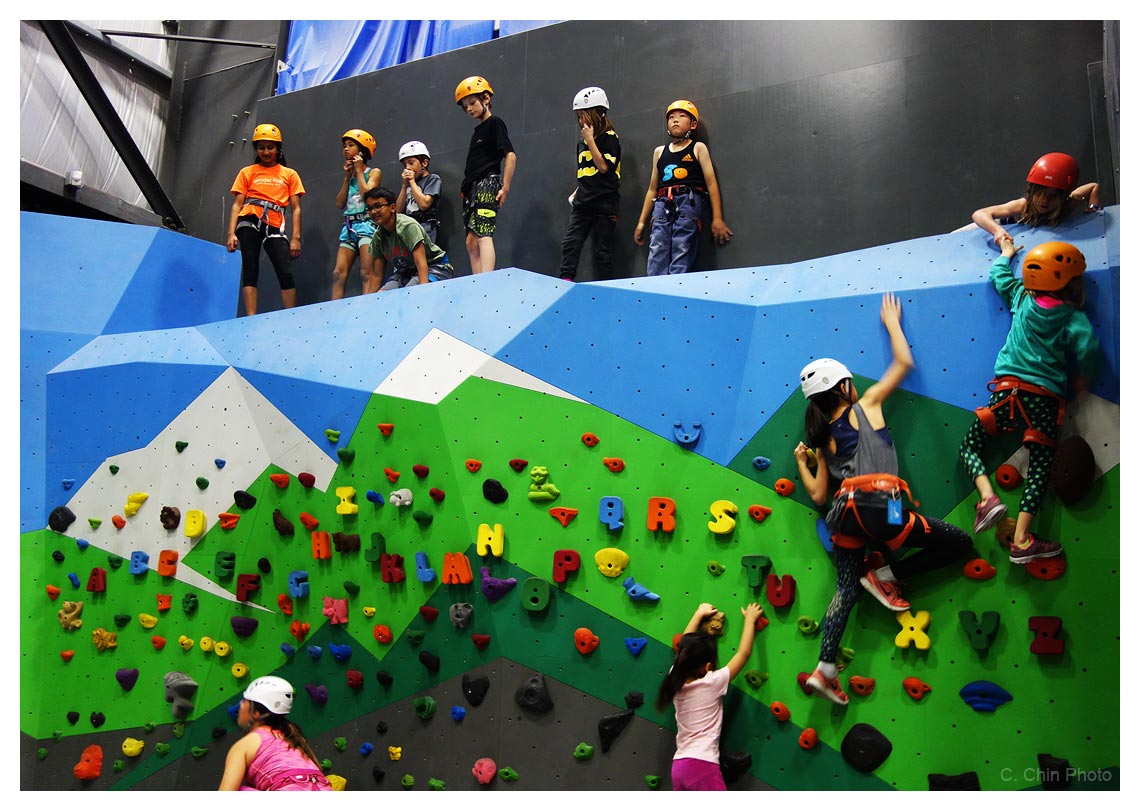
Groups began to form, with some kids heading to the party room to watch the climbing movie, featuring world class climbers Chris Sharma, Alex Honnold, and Margo Hayes. Others hung out with coach Melanie (who seemed to be exercising for hours at a time!) at the fitness area. The rest of us headed to the climbing walls to work off the dessert we ate! At 10pm, the gym doors were locked and all the other guests had left. Team Sender One and their families were locked in. A few parents collectively took a breath as Team Sender One took over LAX!
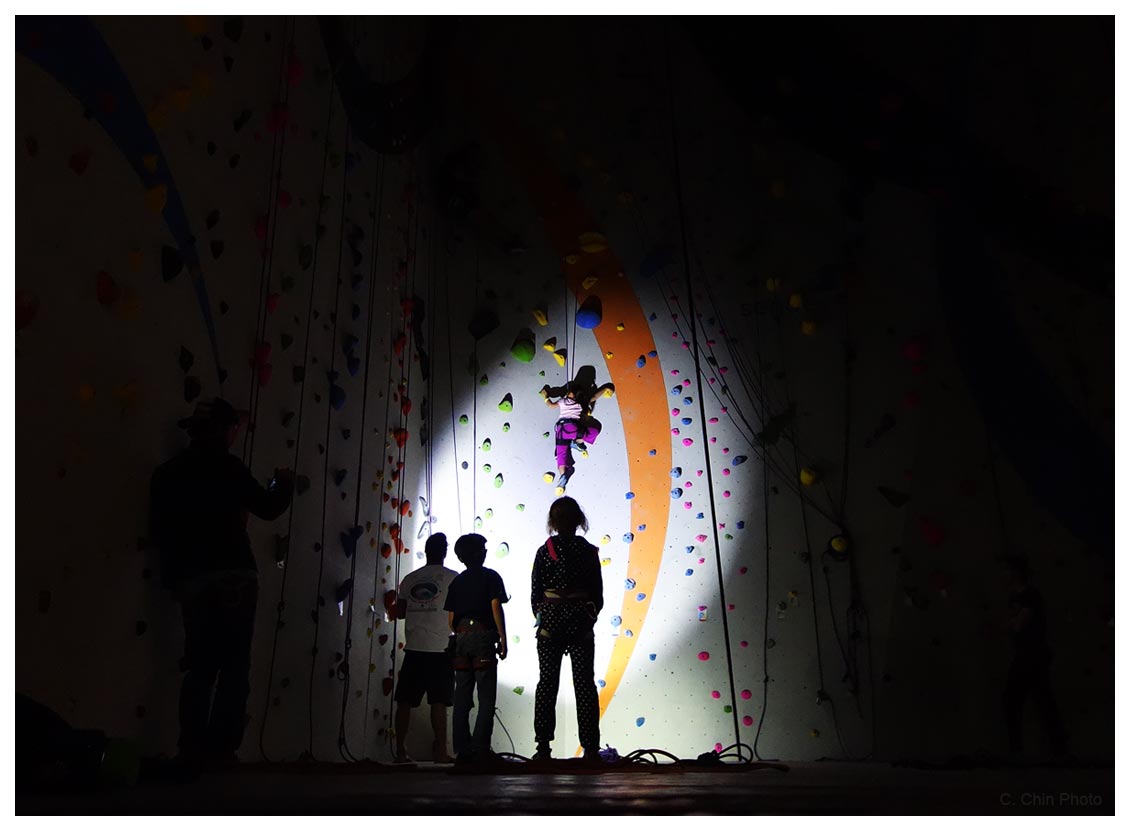
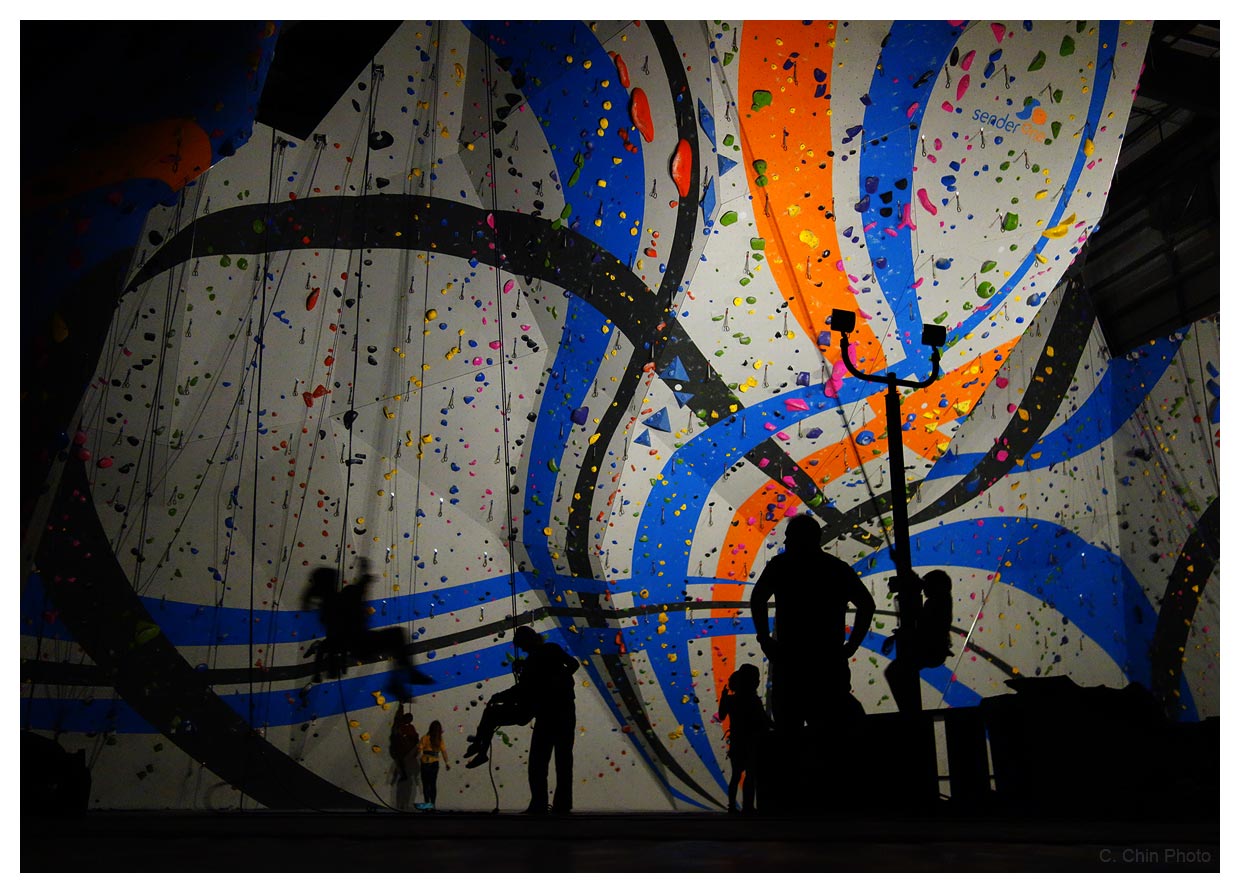
Kids ran all over the place, playing hide and seek, clamoring upstairs and downstairs. The main lights turned off, leaving the spot lights shining on the iconic Torch and the other big walls. Those who brought head-lamps did some "head-lamp climbing".Coaches also rigged up a "King Swing" in the middle of the lead climb arch. This was a long rope that required the swinger to climb up the wall, then jump off, for a long fall and wide swing.
By this time, it was past midnight. Many parents were exhausted since it was past our bedtime! People began staking sleeping spots around the bouldering areas. We set up the ground sheet and sleeping bags/pillows, and as things wound down, we settled to sleep. It was quite a pleasant experience to sleep in the dark and quiet building, with the occasional sound of an airliner taking off or landing at LAX.
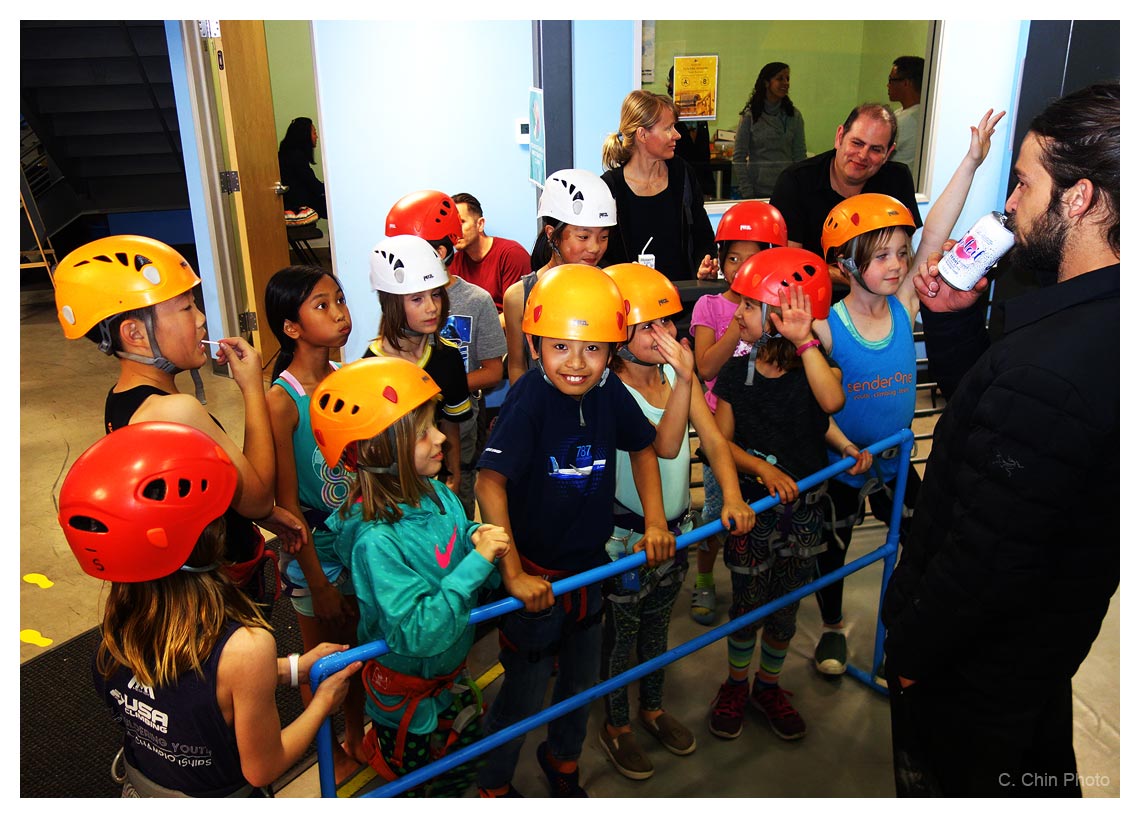
The next morning Team Sender One campers woke up, packed up, and met for potluck breakfast. Coaches Toby and Christian greeted everyone and asked about favorite parts of the lock-in. King swing, Sender City, Rope swings, the (climbing) movie, "everything" were answers, followed by the next question: "When are we going to do this again?" Looks like the lock-in was a success!

by Sender One | Dec 28, 2017 | Blog
the contentWords by Lauren Irvine
“It’s all in your head.”
Sound familiar? It’s a mantra every climber repeats at some point, and usually not in the most comfortable of positions: death gripping, sweaty palms, scrabbling feet, shaky arms. Unless you’re Alex Honnold, you’ve probably found yourself defeated not by a difficult move, but by the mental mettle needed to commit to it.
Whatever your demotivator is--falling, injury, self-doubt--once the haze of fear descends, it’s hard to maintain the focus needed to push through it. And when you’re on the wall facing that fight-flight-or-freeze reflex, your brain realizes that it only has one option: freeze. That means that all the adrenaline dumped into your body by that triggering event has nowhere to go, leaving you hanging there for (what feels like) dear life as your arms rapidly pump out--not exactly the best scenario for logic and rationality to make a comeback!
But it’s not impossible! Gym training is the perfect opportunity to face your fears head on in a safe environment where risks are definitely more perceived than real (although, as always, be sure to follow proper climbing safety guidelines and etiquette). Here are five methods for pushing through the paralysis and getting your mind back on track for the send:
Think different. Spend some time actually analyzing your climbing to identify your strengths and weaknesses. Talk to your climbing partners or gym buddies to get an honest third-party perspective on your movement, body positioning, and efficiency. With a solid idea of where exactly you excel, you can develop a more effective training program to address those problem areas that are unconsciously contributing to your lack of confidence.
Paint yourself a picture. We all find ourselves at the bottom of a route miming the movement sequences with our arms. Turn it into a positive, confidence-building ritual: instead of just waving your arms around, visualize yourself clearly setting up and executing each move. Think about how you can do it as opposed to obsessing over the sketchier moves.
Drill it in. Dedicate some of your warmup time to concentrating on those weaknesses instead of just autopiloting your way up easy routes. You don’t have to work at your level--just consciously choose your warmup routes or problems based on a skill you need to improve, such as balance-heavy slab footwork or dynamic mantle moves. Then, drill yourself on it. The familiarity will translate to your projects.
Safely confront your fear, over and over again. If a long fall above a clip or off a boulder topout is what makes you hesitate, use your gym sessions as an opportunity to train your brain as well as your body. By taking control over falls, you can conquer the terror that comes with the anticipation of empty air. Just do this for one route or a couple boulder problems per session--too much more at once will fry your nerves.
Get on an easier lead route, climb to and clip the third bolt, and immediately take a controlled fall. (Note: let your belayer know what you’re planning to do before you get on the wall, but don’t forget to call “Falling!”) Repeat climbing, clipping, and falling up to the finishing clips. This automatic action will help you cut off the “Don’t fall, don’t fall, don’t fall” loop that can often plague our thoughts on the wall. As you get accustomed to falling safely, take controlled falls on routes closer to and then at your grade.
Similarly, take controlled falls off the bouldering wall. Keep climbing higher and letting yourself drop, taking care to fall and land safely--don’t do your best sack-of-potatoes impersonation.
Prove it to yourself. The worst-case scenarios always happen when you’re on your big project. You reach the crux way more pumped than anticipated, or you’re gassing out because that bouldery section was more muscley than you recalled, and suddenly you’re five feet above your last clip and a committing move on a tenuous hold is between you and the next bolt. It’s the perfect storm of circumstances for that full-body fear to take hold. If you’re getting close to an outdoor excursion or are getting really close on your latest project, head off this potential success-killer at the pass by (safely) putting yourself in that situation. Near the end of a training session, try a harder route when you’re almost maxed out and commit yourself to three attempts to get through the crux. Your own ability may surprise yourself.
In the end, climbing really is just a big game of mind over matter. Train your brain just as you strain your muscles in every climbing session, and your concentration and confidence will continue to increase right alongside your grade.
*Disclaimer: Sender One Climbing is not responsible for any injuries sustained during this training exercise. Use this article at your own discretion. Falls are inherently dangerous, and should be practiced in a controlled environment. Please be considerate of other climbers during all exercises.

by Sender One | Dec 21, 2017 | Blog
the contentWords by Lauren Irvine
Weightlifting has a reputation. Stereotypically, the weight room is the domain of the hulks and lunks whose speciality are picking things up and putting them down (although they do rival climbers in their exertion-powered yells). But, barring that, strength training is incredibly beneficial for any kind of physical activity.
While consistently lifting lighter weights for tons of reps will make you stronger, you’re only activating the slow-twitch muscle fibers needed for endurance--and your climbing training already has that covered. To build the explosive strength needed for the most difficult moves or craziest dynos, you need to focus on your fast-twitch fibers, and to do that, you have to go heavy. Heavy lifting builds strength that will power you through your dynamic crux, but also prevent the joint and tendon injuries that can cut your biggest projects short.
If you haven’t incorporated lifting into your gym training routine, now is the time to start. Luckily, you only need four basic exercises. These core, full-body lifts--preferably done with a barbell, but dumbbells also work!-- will help to start making big gains in strength and stability. Before attempting any of these lifts, educate yourself on proper form and safety by watching videos of the lifts in action (Bodybuilding.com is a great resource). Please note that lifting without a shirt does not increase your strength, and that shirts are required in the Sender One fitness area. Practice with an empty barbell or light dumbbell to ensure you have the correct movement.
Barbell Deadlift
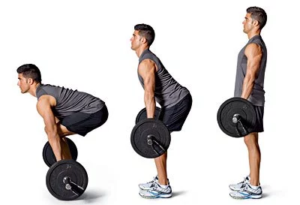
Image from https://hamzazoraa.wordpress.com/2013/09/11/how-to-perform-the-biggest-move-in-the-gym-the-barbell-deadlift/
Deadlifts are a full-body movement that will make your back as solid as the best rock at the crag. It’s a movement you’ll find yourself using in the real world anytime you’re faced with picking up something heavy, from a piece of furniture to your kid. The deadlift hits a huge number of critical stabilizer muscles: lower back, glutes, abs, quads, hamstrings. And, once the weight starts really going up, it can double as grip training--many heavy lifters use chalk to aid their grip.
Barbell Front Squat

Image from https://legionathletics.com/how-to-squat/
A super-effective full-body movement that utilizes almost every muscle group, squats are the top of the weightlifting echelon. They not only build allover strength via a completely natural movement, but also increase the flexibility of your knees and hips. Squats come in two primary flavors--back and front--and while back squats hit your butt, front squats are better for climbers. They’re much more quad-dominant, and maintaining the proper upright form throughout the rep will also work your core and back.
Bent Row

Image from https://julielohre.com/bent-barbell-row/
Also known as a barbell row, this lift hits your stabilizer muscles with an emphasis on your middle back and core--sensing a theme here? Keeping your abs tight, opening up your chest, and using your back (not your arms) to move the weight will result in a simple movement that simultaneously strengthens your lats, middle back, traps, core, and even your biceps.
Push Press
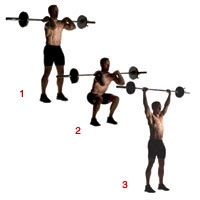
Image from http://grownewmuscles.blogspot.com/2009/11/front-squat-to-push-press.html
Climbers are really good at pulling (see: pull-ups, hangboards, any time you’re on the wall) but pressing? Maybe not. Enter the push press: an upper-body compound movement, the push press hits your upper back, shoulders, chest, and arms in a fluid, explosive motion. Unlike its static brother, the overhead press, the push press engages your hips and legs for some drive. So, you can both get more weight up thanks to the momentum and also work your legs and core in the process. And since you’re standing, you’ll instantly feel any imbalances in your form and can adjust appropriately.
Bodyweight Accessories
Want to challenge yourself further? Consider throwing in a couple rounds of eight to ten reps of the following bodyweight exercises as your cooldown: dips, push-ups, inverted rows, hollow rocks/V-ups, or hyperextensions/glute-ham raises.
Once you feel solid, incorporate these lifts into your program twice a week with three sets of each exercise. Do five reps for the first set, four for the second, and three for the third, increasing the weight each set, and finish all three sets of one life before moving on to the next. Bonus: heavier weight means a shorter workout, so these lifts make a perfect warm-up routine before hopping on the hangboard.
Lifting may not appeal to everyone, but the benefits are undeniable. Your routine doesn't need to use intricate machines or a multitude of plates for it to be effective. As with any workout, stay smart and be consistent to get your gains! Good luck, climbers!
*Disclaimer: Sender One Climbing is not responsible for any injuries sustained during this training exercise. Use this guide at your own discretion. Weightlifting can result in injury if not performed properly. Choose weights accordingly and be mindful of your body and form. Shirts are REQUIRED at Sender One Fitness Areas.
by Sender One | Dec 14, 2017 | Blog
the contentWords by Lauren Irvine
If you’re training to climb harder, your hands are feeling the burn just as much as your back and legs. You’re probably more than familiar with the humble hangboard. Now available in dozens of shapes studded with a myriad of crimp-and-slot combinations, the hangboard is an essential fitness tool for most serious climbers.
So, you’re asking, where does the rice come in? Together, hangboard and rice bucket workouts are crucial for injury prevention in climbers. You can always find a variety of hangboards in the gym training area, while a rice bucket can be used at home.
We take our hands for granted, assuming our ten fingers will keep us secure on all types of terrain, but we all know the toll that climbing takes on those tiny tendons. From a ruptured A2 pulley to a strained collateral ligament, finger injuries can be debilitating for a climber--some even require surgery with a minimum six-week recovery. Definitely not training time you want to lose!
No amount of tape and chalk can compensate for a lack of strength, so the sooner you incorporate regular injury prevention work into your regimen, the better you can pull, hang, and crimp with confidence. A solid hangboard/rice bucket routine should take you no more than 30 minutes to complete (including rest periods), but leave you feeling exhausted. Make sure you get a rest day afterward--these workouts will torch your tendons.
In the Gym: Hangboard
At its core, a hangboard workout is not much more than a series of dead hangs on different holds, but good form and sustained reps will soon make you feel their effectiveness. Before you leap up and grab the top jug holds, though, you need to warm up with a few minutes of light cardio, a set of pull-ups or pushups, and some upper-body stretches. This is extremely important! Not properly warming up before a hangboard session can increase the chance of injury, the exact opposite of what we want. Next, ensure you can reach the hangboard without needing to jump to it--use a box or chair if necessary--because letting go and dropping to the floor can also strain the tendons.
To keep solid deadhang form, use an open-hand grip and keep your shoulders back to avoid unnecessary tension. Choose six holds on which you want to work--edges, crimps, pockets, or slopers--and work on them in sets of five, going from easiest to most difficult.

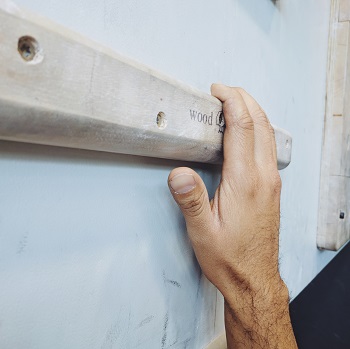
Open-Hand Grip

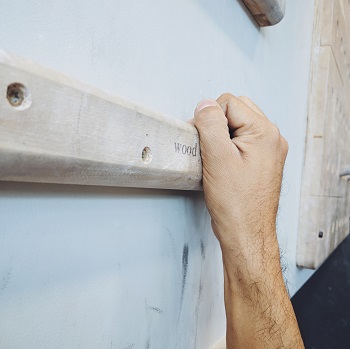
Closed-Hand Grip (Crimp)
Here’s a simple example cycle to get you started. One set involves a 10-15 second deadhang followed by a one-minute rest; do five sets for each grip:
- Four-finger jug
- Medium edge
- Wide pinch
- Small edge
- Medium pinch
- Sloper
- Three-finger pocket
There’s plenty of material on hangboard routines on various types of hangboards, so look around. But remember, don’t overdo it. While hangboarding will increase strength, we want to also emphasize its prehabilitative qualities, so adjust your workout to what feels comfortable to your body. Don’t forget to cool down with some light stretching or easy climbing. Your cool down should be even easier than the warm up!
Just so you know, we offer weekly Hangboard Classes at SNA for members to help you set up a routine, and learn how to maximize your training. Spaces are limited! Classes are every other Monday from 7:30PM to 9PM. Click here to sign up (SNA only)!
At Home: Rice Bucket
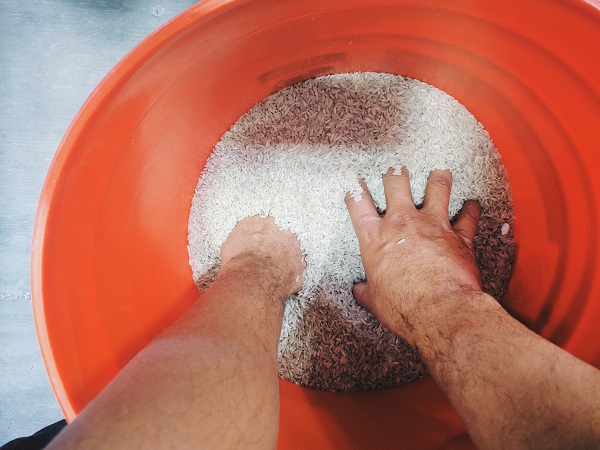
It may sound like something out of a martial arts movie, but rice bucket training is enormously effective for injury prevention in hands and forearms. Five minutes in a rice bucket can leave your arms as pumped as an hour of climbing. All you need is a standard work or ice bucket (a medium-size plant pot also works) and a 20-pound bag of rice.
Kneel or squat down in front of the bucket--lay down a towel if you’re afraid of spillage, although avoiding that is the goal--and start with 15-second intervals of each of these 12 movements. Perform them smoothly and rapidly, but with control, and remember to breathe. If you don’t feel the pump halfway through, up the time for each movement to 20-30 seconds.
- Stab fingers into rice and make a fist. Withdraw and repeat.
- Stab fingers into rice and open hands wide and flat. Withdraw, palms away from you, and repeat.
- Embed fists in rice and slowly rotate in one direction. Withdraw when time is up.
- Embed fists in rice and slowly rotate in opposite direction. Withdraw when time is up.
- Embed fists in rice and move them side to side.
- Embed fists deep in rice and move them up and down.
- Staying on the surface of the rice, quickly and repeatedly snatch at rice. Don’t spill!
- Staying on the surface of the rice, quickly and repeatedly push rice away with fingers.
- Dig thumbs into rice with gouging motions.
- Keeping fingers together, stab and claw at rice.
- Quickly and repeatedly grab and squeeze handfuls of rice with as much pressure as possible.
- Finally, holding a handful of rice in each hand, move into a wide squatting stance. Squeeze rice while maintaining stance.
We also have rice buckets in our fitness areas for a post-climbing session. The rice bucket can help stretch and strengthen antagonistic muscle groups which leads to a faster recovery and better injury prevention. Stay healthy, stay strong. Good luck, climbers!
*Disclaimer: Sender One Climbing is not responsible for any injuries sustained during this training exercise. Use this guide at your own discretion. Hangboarding can result in injury if not used properly. Hangboard training is not recommended for new climbers with less than 2 years of consistent climbing experience.