Words by Lauren Irvine
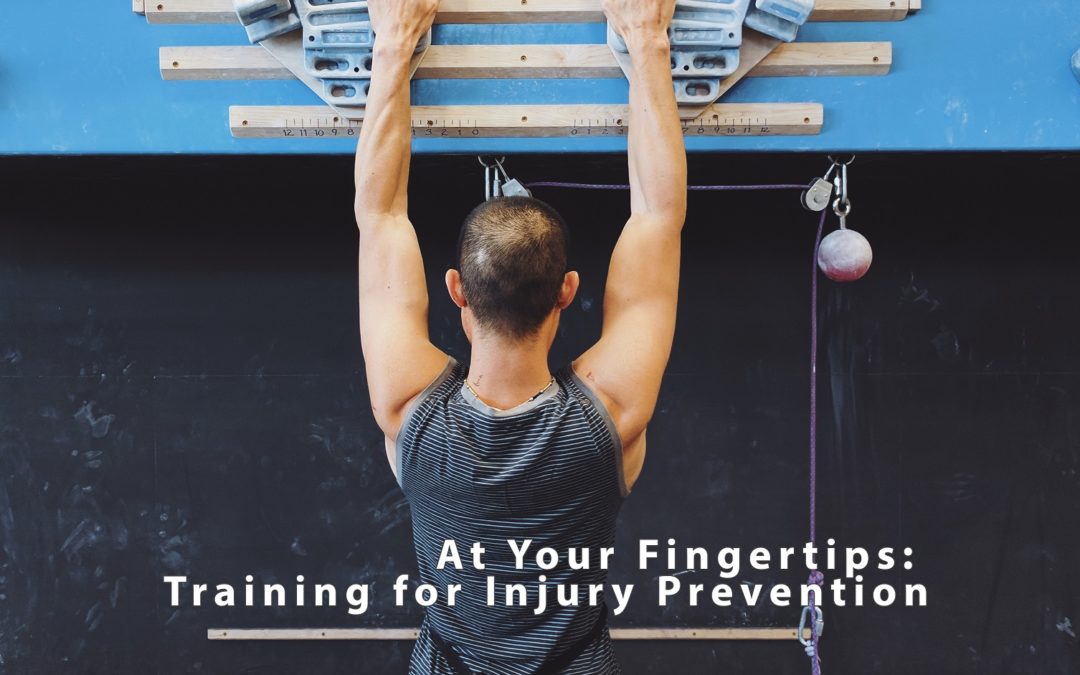
If you’re training to climb harder, your hands are feeling the burn just as much as your back and legs. You’re probably more than familiar with the humble hangboard. Now available in dozens of shapes studded with a myriad of crimp-and-slot combinations, the hangboard is an essential fitness tool for most serious climbers.
So, you’re asking, where does the rice come in? Together, hangboard and rice bucket workouts are crucial for injury prevention in climbers. You can always find a variety of hangboards in the gym training area, while a rice bucket can be used at home.
We take our hands for granted, assuming our ten fingers will keep us secure on all types of terrain, but we all know the toll that climbing takes on those tiny tendons. From a ruptured A2 pulley to a strained collateral ligament, finger injuries can be debilitating for a climber--some even require surgery with a minimum six-week recovery. Definitely not training time you want to lose!
No amount of tape and chalk can compensate for a lack of strength, so the sooner you incorporate regular injury prevention work into your regimen, the better you can pull, hang, and crimp with confidence. A solid hangboard/rice bucket routine should take you no more than 30 minutes to complete (including rest periods), but leave you feeling exhausted. Make sure you get a rest day afterward--these workouts will torch your tendons.
In the Gym: Hangboard
At its core, a hangboard workout is not much more than a series of dead hangs on different holds, but good form and sustained reps will soon make you feel their effectiveness. Before you leap up and grab the top jug holds, though, you need to warm up with a few minutes of light cardio, a set of pull-ups or pushups, and some upper-body stretches. This is extremely important! Not properly warming up before a hangboard session can increase the chance of injury, the exact opposite of what we want. Next, ensure you can reach the hangboard without needing to jump to it--use a box or chair if necessary--because letting go and dropping to the floor can also strain the tendons.
To keep solid deadhang form, use an open-hand grip and keep your shoulders back to avoid unnecessary tension. Choose six holds on which you want to work--edges, crimps, pockets, or slopers--and work on them in sets of five, going from easiest to most difficult.
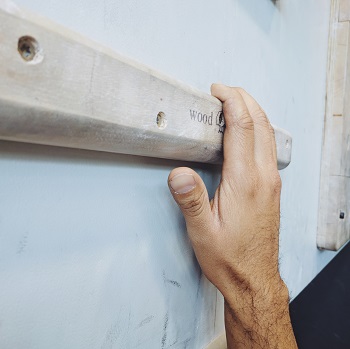
Open-Hand Grip
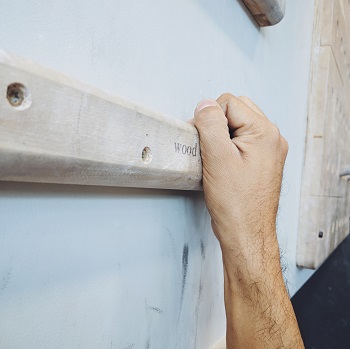
Closed-Hand Grip (Crimp)
Here’s a simple example cycle to get you started. One set involves a 10-15 second deadhang followed by a one-minute rest; do five sets for each grip:
- Four-finger jug
- Medium edge
- Wide pinch
- Small edge
- Medium pinch
- Sloper
- Three-finger pocket
There’s plenty of material on hangboard routines on various types of hangboards, so look around. But remember, don’t overdo it. While hangboarding will increase strength, we want to also emphasize its prehabilitative qualities, so adjust your workout to what feels comfortable to your body. Don’t forget to cool down with some light stretching or easy climbing. Your cool down should be even easier than the warm up!
Just so you know, we offer weekly Hangboard Classes at SNA for members to help you set up a routine, and learn how to maximize your training. Spaces are limited! Classes are every other Monday from 7:30PM to 9PM. Click here to sign up (SNA only)!
At Home: Rice Bucket
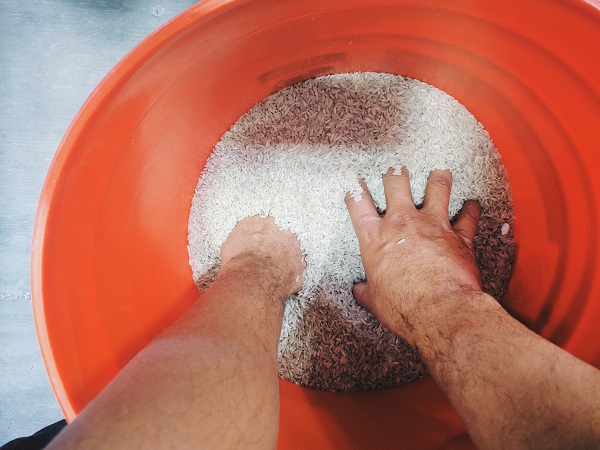
It may sound like something out of a martial arts movie, but rice bucket training is enormously effective for injury prevention in hands and forearms. Five minutes in a rice bucket can leave your arms as pumped as an hour of climbing. All you need is a standard work or ice bucket (a medium-size plant pot also works) and a 20-pound bag of rice.
Kneel or squat down in front of the bucket--lay down a towel if you’re afraid of spillage, although avoiding that is the goal--and start with 15-second intervals of each of these 12 movements. Perform them smoothly and rapidly, but with control, and remember to breathe. If you don’t feel the pump halfway through, up the time for each movement to 20-30 seconds.
- Stab fingers into rice and make a fist. Withdraw and repeat.
- Stab fingers into rice and open hands wide and flat. Withdraw, palms away from you, and repeat.
- Embed fists in rice and slowly rotate in one direction. Withdraw when time is up.
- Embed fists in rice and slowly rotate in opposite direction. Withdraw when time is up.
- Embed fists in rice and move them side to side.
- Embed fists deep in rice and move them up and down.
- Staying on the surface of the rice, quickly and repeatedly snatch at rice. Don’t spill!
- Staying on the surface of the rice, quickly and repeatedly push rice away with fingers.
- Dig thumbs into rice with gouging motions.
- Keeping fingers together, stab and claw at rice.
- Quickly and repeatedly grab and squeeze handfuls of rice with as much pressure as possible.
- Finally, holding a handful of rice in each hand, move into a wide squatting stance. Squeeze rice while maintaining stance.
We also have rice buckets in our fitness areas for a post-climbing session. The rice bucket can help stretch and strengthen antagonistic muscle groups which leads to a faster recovery and better injury prevention. Stay healthy, stay strong. Good luck, climbers!
*Disclaimer: Sender One Climbing is not responsible for any injuries sustained during this training exercise. Use this guide at your own discretion. Hangboarding can result in injury if not used properly. Hangboard training is not recommended for new climbers with less than 2 years of consistent climbing experience.